The other day my old desk chair finally gave up the ghost when the seat back on it broke.
When pricing out a new desk chair I was quite shocked at how much money a reasonable desk chair costs these days.
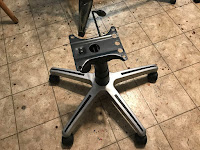
Not being very keen on the idea of spending a lot of money on a chair while considering that the bottom half of my old chair was still in very good shape, I wanted to find some other, more cost-effective way to have a very durable chair while at the same time saving base of my old chair from going into the landfill.
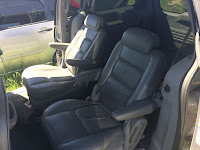
At that point, I remembered seeing a number of leather seats in the old minivans in my local pick and pull auto wrecker yard during one of my recent scouting missions there. Typically these seats are usually very well made and need to be comfortable for those long road trips.
More importantly in the case of my local auto wrecker yard, those seats are also very cheap.
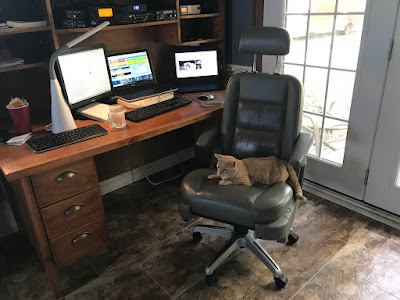
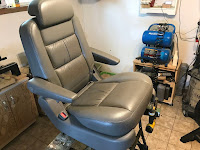
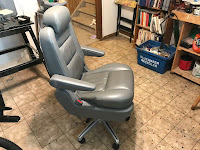
Inspiration hit, and after a quick trip back to the auto wrecker, and a Saturday afternoon of building, I had a very unique desk chair - that even included its own cup holder!
Step 1: What Parts Do You Need for Your Chair?
The beauty of this project is that it requires a minimum amount of tools and materials to put it all together.
To make the chair, all you need is:
Materials
- One car seat - in my case I picked a seat from the second row of a mini-van in order to have armrests
- One 16 inch X 16.5-inch piece of 3/4 inch plywood
- One base from an old desk chair - as I mentioned earlier, I had a broken desk chair as a donor, but I see a lot of similarly broken chairs on garbage day in my neighborhood - so I suspect you can easily source one for little to no cost
- Four 3 inch 5/16 bolts
- Four 1.5 inch long 5/16 inch carriage bolts
- Four 1/2 inch nuts
- Four 1/2 inch lock washers
- Black Paint
Tools
- Socket Wrench
- 10mm and 1/2 inch sockets
- Hammer
- Circular saw (in my case, a Dremel UltraSaw)
- Paintbrush
- Cold Chisel
- Slotted screwdriver
- Tape Measure
Step 2: Taking a Seat
The first thing to do is a quick scouting mission to your local auto wrecking yard for to find the perfect seat for your chair.
There are many different styles of seats in vehicles these days, with many different colors and materials to choose from. In the case of my desk chair, I had the following criteria
The seat needed to be leather.
The seat had to have 2 armrests - this excluded a lot of car seats since most will have one armrest (since the other armrest will be on the door of the vehicle) or no armrests
A black colored seat was preferred but not a deal-breaker if one couldn't be found.
The most promising candidates in my search proved to be minivans that had second-row captains seats since those particular seats typically have 2 armrests. Minivans have an additional benefit in that the seats can be easily removed with a quick pull of a lever on the bottom of the seats (no tools needed!)
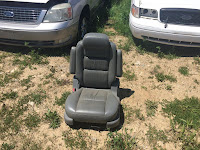
After much searching, I eventually settled on what was once a very high-end Ford Freestar. This particular van had leather captain seats in the style I was wanting (albeit grey, but for $20, I wasn't going to quibble about it.)
Once I got the seat home, the next step was to remove the mounting hardware on the bottom of the seat that was originally used to secure the seat to the floor of the van.
Luckily the mounting hardware for the seat is attached via a series of 5/16 inch bolts, so removing the seat mounting was fairly straight forward (with one exception that I will get to shortly)
I started by removing the plastic cover on the bottom of the seat that hid the mounting hardware. In this case, this cover is removed by removing a number of Torx screws that are used to attach the cover. Once the screws are removed, the plastic cover should just be left off from the seat.
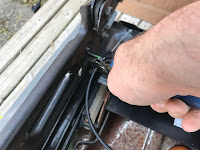
With the plastic cover removed, the next item to tackle was the assembly that anchors the seat to the floor of the van. This part is attached to the seat with a series of 10mm bolts. To remove the anchor assembly, unbolt the anchor assembly from the seat with a socket wrench and a 10mm socket. With the bolts removed, the assembly is still attached to the seat with a couple of cables that were used to adjust the seat - once the cables were detached from the seat, the anchor assembly was removed.
Next, there were four 10mm bolts that were attached to the slide adjustment for the seat - those four bolts were also removed with the socket wrench.
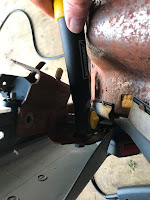
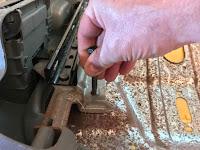
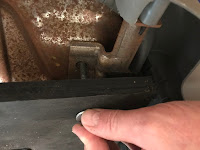
The next step was then to remove the slide rails off of the bottom of the seat. I found this to be the most challenging part of the whole build. By design, these seats have built-in stops on each end of the rails to prevent the seat from sliding too far forward or back. I tried a variety of ways of removing the stops but I ended up resorting to the brute force method of hammering the slides past the stops with a hammer and a cold chisel. Once the rails were past the stops, the rails were easily removed.
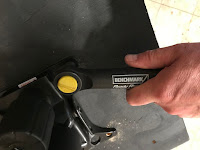
With the rails removed the last step was to remove the seat adjustment lever. This was done by popping the 2-speed nuts that fastened the lever to the seat and removing the lever. As the last step, I then remove the adjustment lever mounting bracket from the seat rail mounts by removing the bolts connecting it to the seat with the socket wrench.
Step 3: Measuring for the Chair Mounting Plate
With the original seat mounting equipment removed, we need to replace it with a new mounting plate in order to attach the bottom half of the desk chair to the seat.
In order to determine the size of the mounting plate, we need to determine an appropriate location for the mounting plate to be installed on the seat bottom and take measurements of that location.
After inspecting the bottom of the seat, I determined that the best way to attach the mounting plate is to use the four 5/16 inch bolt holes that were left in the bottom of the seat from the previous step as the means of attaching the plate to the seat, with the mounting plate sitting on top of the remnants of the seat slide, which looked to be a very stable platform the mounting plate to sit on.
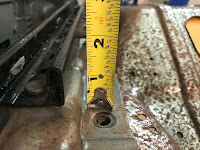
After determining the location I then measured the length the seat slide and also measured the distance between the far edges of the 2 slide rails. Additionally, I needed to measure the distance from the 5/16 bolt holes in the seat to the top of the slide rail in order to determine the length of the bolts that I needed.
In the case of my seat, I needed a mounting base that was 16" X 17" in size. The distance from the bolt hole location to the top of the slide rail was 2" - which if I put into consideration that I will be using 3/4 inch plywood for the mounting base, meant I would need a 3 inch long bolt for mounting the plate to the seat.
Step 4: Cutting Out the Mounting Plate
Once the measurements for the mounting plate had been sorted out, the next step was to actually create the mount.
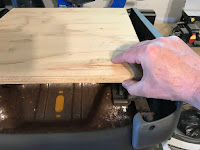
The mount is simply created by cutting a piece of 3/4 inch plywood to the correct size (which as you recall in the previous step, was 16" X 17") with a circular saw
Step 5: Preparing the Seat Mount
With the mount for the seat cut out, the next step was to locate and drill the holes in the seat mount so that it can be attached to the seat.
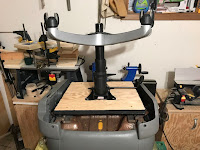
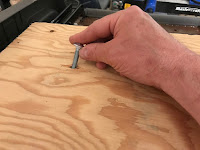
I started by screwing in the four, three-inch 5/16 inch bolts into the bolt holes in the seat bottom. I next laid the seat mount on top of the now protruding bolt heads that were now above the seat rail.
I made sure that the base was centered on the bottom of the chair.
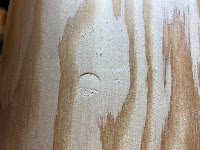
With a block of scrap wood and a hammer, I then gave the seat mount a good hard "thump" over each of the bolts.
What we had done was create marks on the wooden mount with the protruding bolt heads.
I then removed the mount from the seat bottom and removed the bolts from the seat.
When you turn over the seat mount, you should see indents in the wood from the bolt heads.
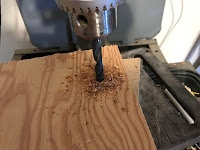
With a drill press and a 5/16 drill bit, I drilled a hole through the seat mount at each of the marked bolt hole locations.
Step 6: Preparing to Mount the Chair Base
Once the holes had been drilled to attach the mount to the bottom of the seat, I needed to also mark and drill the holes in the mount in order to attach the base of the chair.
To do that I first needed to place the mount back onto the bottom of the seat, making sure that the holes that I had just drilled into the mount align with the bolt holes in the seat.
I then placed the top of the chair base on top of the mount and set the base in the middle of the seat mount.
I marked the locations of the mounting holes for the seat base with a pencil and drilled out the marked locations with a 5/16 inch drill bit.
Step 7: Putting It All Together
Finally, I was ready to put it all together.
I gave the seat mount a couple of coats of paint and allowed it to dry.
Next, I attached the chair base to the mount. I started by taking the four 1/2 inch long 5/16 inch carriage bolts and placed them into the holes in the mount that were drilled out for the chair base. I then flipped the mount over and set the mount on top of the chair base so that the four carriage bolts fed through the four holes in the chair base.
With the locking washers and nuts, I then secured the chair base to the seat mount with a socket wrench, making sure that the bolts were secured as tightly as possible.
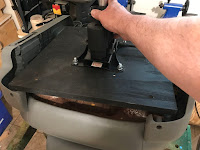
The final step was to secure the mount to the bottom of the seat. I flipped the completed mount and chair base assembly over and placed then on the bottom of the seat so that the drilled holes in the mount for the seat were aligned to the bolt holes located in the bottom of the seat. Once everything was aligned, I attached the mount to the seat bottom with the four 3 inches long 5/16 bolts and secured it to the seat with a socket wrench. Again, I made sure that the bolts were secured as tightly as possible.
Once that was done, I flipped the chair over again so that it was sitting on its base, and the chair was complete!
Step 8: Finished!
The only thing left to do was to give the leather a nice cleaning with some leather furniture cleaner and a soft cloth, and the chair was ready for use.
I've been using this chair for a few months now, I've found it to be a very comfortable chair that provides a lot of back support - very important as I am starting to get a bit older.
I also found that the adjustable headrest to be a very pleasant feature - something I didn't realize that
I would like in a desk chair until I had one that did.
Not bad for an afternoon's work with a couple of things that were considered junk!
I just need to keep reminding myself to use the cup holder for my coffee...

























No comments:
Post a Comment