Yes, it's been a little while since the last update. This fall I started a new job which has taken a fair bit of my time as of late, and just life, in general, has been making its presence known. In particular, I have noticed quite a significant uptick in requests for some of my laser engraved signs. So I have been spending quite a bit of time in the shop, just not enough time for writing it seems...
Now that I have my excuses out of the way, it's now time to focus on the next chapter of bringing my basket case tractor back to life.
Now that I had the engine installed and wired up and running, the next thing to tackle was to spiff things a little bit.
As I mentioned in my last posts, the basic frame of the tractor was in really good shape, however, the large amount of surface rust didn't really make it look all that good.
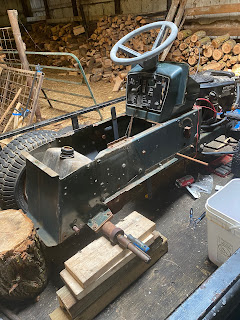
To do as proper a job as possible, I decided that I should remove as many parts of the tractor as possible and clean, prime and paint the parts individually. Since I had already removed the hood and front grill in order to work on the engine, I was pretty much halfway there anyway.
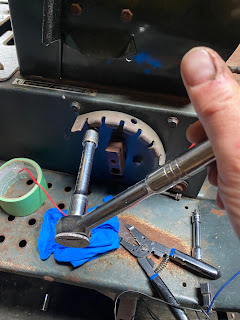
To complete the removal process, I removed the fenders, and seat mount by unfastening the bolts that held them to the frame.
While I was at it I also removed any hardware that I wouldn't be using, such as the mower deck height adjustment bracket.
With the parts removed, it was time to get things ready for painting.
If I wanted to do a completely proper job of things, I would look to strip the old paint down to the bare metal, followed by applying a coat of primer and finally the finished paint coat.
In order to do this, I really needed to have access to a sandblaster. I did look into buying one and while I could get a pretty decent one for a reasonable amount of money, I decided against it, mainly because I didn't really want to deal with the mess that it would generate.
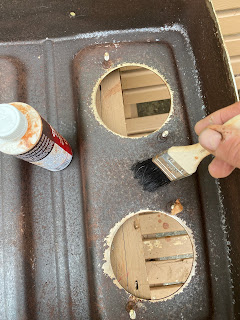
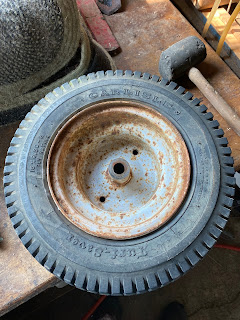
Instead, I went with a more chemical-based solution. When I was prowling my local hardware store, I came across a product in the automotive aisle that promised to convert rust into black oxide, which supposedly stops the rusting process and creates a metal surface that can be easily painted.
The secret sauce of those types of products is phosphoric acid. The acid lowers the pH of the rust to convert it into this more inert form of iron, which then can be easily sanded and painted.
I pick up a bottle of the stuff, along with a cheap bristle brush and I started giving the parts a coating of the solution.
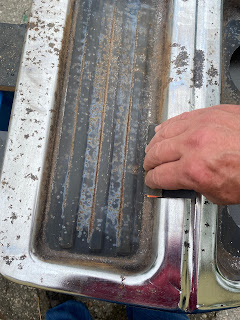
Once the solution was dry I then rinsed the excess off with some water and I then sanded the parts, starting with medium-grit sandpaper, eventually working up to fine-grit sandpaper until I had all the metal surfaces relatively smooth.
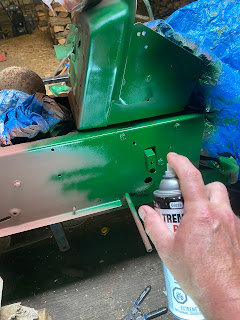
With everything all done in primer, it was time to consider how I wanted to paint it. The nice thing about this particular tractor was that it was a bit of a "Mutt" in that it was produced for a variety of brands and came in a large variety of colours. Since this particular tractor came in a 2 tone green colour, I decided to stay with that theme. However, I wasn't going to colour match to the original colours but stay as close as possible with colours that were available for commonly available rust paints - just to make it easier for any touch-up work I may need to do along the line.
After a quick trip to the hardware store with a collection of spray paint cans. Along with the two shades of green I also bought a can of silver and flat black for the front grille and gloss white for the wheels.
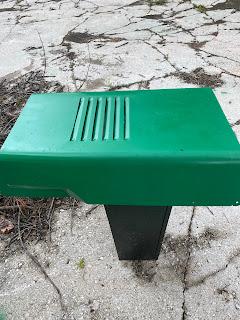
I then gave all the parts a couple of coats of paint, waiting for the previous coat to dry overnight before applying the next coat.
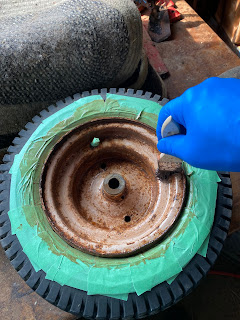
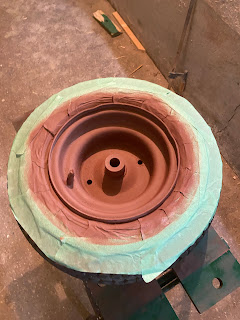
For the wheels, I also did things a bit unorthodox. Traditionally, you should remove the tires from the wheels before painting them, basically just to avoid having painted tires. But after my experiences with the one rear tire, I really was in no mood to fool around with the other 3 wheels.
Instead, I settled on painting the wheels with the tires in place. To avoid the dreaded painted wheel I applied a heavy layer of painter's tape around the edge of the tire where it met the rim, making sure that the tape was a close to the rim as possible.
With everything now sporting a new coat of paint, the parts certainly now looked a lot better, I hope it looks just as good when it's all put back together again.









No comments:
Post a Comment