For the past month or so I have been getting a fair bit of use out of my new CNC router and I've been busily trying my hand at doing some simple projects like making some cut-out letters and Christmas ornaments as I continue to learn how to use the machine.
For all of its versatility, I did notice a few drawbacks with it.
For one, it can get a bit noisy, while not really a problem for me since I have it installed in a garden shed in my backyard, I do wonder how the neighbors feel about hearing a loud humming noise emanating from my shed.
Secondly, the router does throw up a fair bit of fine sawdust into the air while it's doing its thing and after a while, I have noticed a fine layer of sawdust has now started to coat all the tools that I keep in the shed.
To combat the noise and dust issue head-on, I decided that an enclosure of some kind would be the best solution. I have noticed that there are many enclosures available to buy online, and I did see that there were also a few examples of homemade ones posted online.
I did want to be as cost-effective as possible with my enclosure, but of course, I didn't want to completely cheap out and just buy a plastic tote from the store - where was the fun in that!
My plan is to build an enclosure out of leftover pieces of plywood and MDF board that I had laying around from previous projects. Since my router had an offline controller, also I wanted to have it so that the controller was mounted in a stationary location on the outside of the enclosure to eliminate stress on its cable (I wanted to keep it from bending the wires connecting the controller to the router, so installing it on a lid that was continuously opening and closing was out of the question) but still be able to easily see and operate the controller from outside of the enclosure.
Likewise, I wanted to have some ventilation for the motor control board on the router, since I noticed that it tended to heat up a bit when the router was operating, so some sort of airflow was needed.
Finally, I wanted to have the enclosure constructed in such a way that I can easily vacuum out the sawdust after a routing session
After some rough sketching, I settled on building an enclosure that had a bit of a quasi-clamshell design. with a little platform at the top of the enclosure to mount the controller and a little lip on the front edge to keep the sawdust inside the enclosure, but still making it easy to attach and remove the workpiece on the router.
After taking some measurements of the router, I determined that an enclosure of 16" X 18" X 13" would do the trick
With those specifications in mind, I started off by designing and building the base of the enclosure.
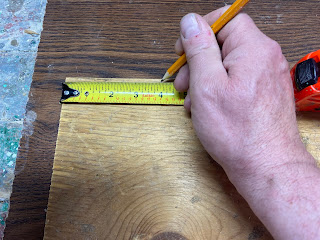
I started by cutting out 4 pieces of 1/2 inch plywood:
- One board cut to 16 X 18 for the bottom of the enclosure
- Two boards cut to 13 X 16 for the enclosure side
- One cut to 19 X 13 for the back of the enclosure.
To create the clamshell effect, I wanted to cut a 45-degree angle into the sides starting 4 inches in from the top back of the sides, ending 3 inches in from the bottom front of the sides.
I marked those locations on the sides and made the cuts with my table saw
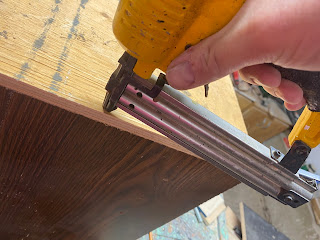
Using some wood glue and brad nails I then attached the sides to the base of the enclosure.
After that, I then attached the back of the enclosure to the sides and base of the enclosure with glue and brad nails.
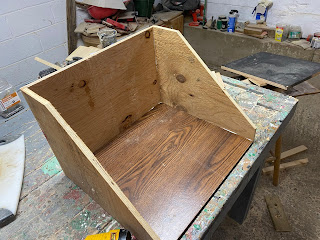
With the basic tub of the enclosure now built, it was time to give it a bit of a test fit with my router.
So far the router fitted quite nicely inside the base of the enclosure. There was plenty of room for all the moving parts of the router.
This was as far as I got with the enclosure this week, but so far I am pretty pleased with how things are evolving.
Next week I will work on getting the lid of the enclosure put together,


I like the design! However, your dimensions in the drawing are partially inches and part metric. Would you update the drawings with either all inches or all metric drawings please?
ReplyDelete