At the end of the week, I had a somewhat functional workbench and if it was going to end up in the shop or in a garage, I could have called it good and finished the build there. But since it was going to be living in my home, it really needed to at least somewhat blend into the rest of the furniture in the house. I really needed to dress it up a bit more.
The plan is to give the workbench a bit of a rustic country look - like something that you might find in a country home. To do this I decided to make it look like an old dry sink by enclosing the sides of the workbench with wooden planks with a door in the front to provide storage and to keep any tools and supplies hidden from sight.
Additionally, since it is going to be a functional workbench, I figured that a rustic country motif would probably be more appropriate than something that would be considered fine furniture since the workbench will be taking some dents and scratches while it's being used, which will add character to it over time, very similar to traditional country furniture.
The inside of the workbench will also be a couple of shelves to allow for storage.
To enclose the workbench I decided to use the deck boards from a pallet that I had recently disassembled, which had a dimension of roughly 1 X 4. I took all the deck boards and squared up the edges on them by cutting thin strips of the boards with my table saw.
I started by enclosing the sides of the workbench by measuring the distance between the 2 X 4 mount of the workbench top and the bottom plywood strip on the workbench.
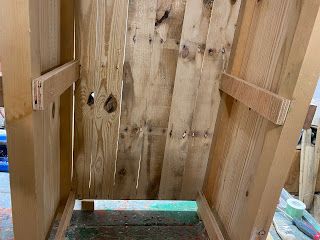
Taking that measurement I then cut out 6 deck boards and attached them to the sides of the workbench by fitting them between the support posts of the workbench, behind the plywood strips.
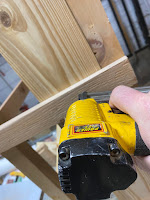
I attached the deck boards to the plywood strips with 1-inch brad nails, with the boards set beside each other as tightly as possible.
The first 2 boards on each side were installed fairly easily, however, I did find that I did have to trim the third board a little to make things fit.
With the three sides installed, I then installed brackets inside of the workbench for the shelves. I made the brackets out of the same 2-inch strips of 3/4 inch plywood that I had used for the outside supports for the workbench.
Measuring the distance between the inside back of the workbench to the front, I cut out four strips to that length and installed them inside the workbench. The first 2 strips were installed at the same level as the bottom support strips of the bench to create a floor inside the cabinet when the shelf was installed
The second set of strips were installed at the midway point of the cabinet. All four strips were attached to the support posts with 1-inch wood screws.
After that, I measured the distance between the strips and cut out two sections of 1/2 inch plywood to those dimensions.
The shelves were installed inside the workbench by placing them on top of the shelf supports and securing them in place with brad nails.
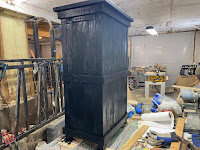
This completed the construction of the main structure of the workbench. I took the opportunity at this time to give it a quick paint job.
I did have a few options on how to finish the cabinet since the grain on pallet deck boards did look rather really attractive do doing something like putting on a spar varnish would have been a pretty good option however I settled on a black acrylic paint, which covered a lot of blemishes on the wood, but still allowed the wood grain to come through.
The final thing to do was to add a door.
My plan was to have the door sit on the outside of the cabinet, overlapping the front support posts by about half an inch.
Based on that assumption, I determined that a door of about 20 inches X 33 inches should work fine. I then cut out a sheet of 1/2 inch plywood to that size.
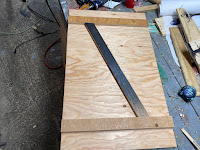
In keeping with the country theme, I wanted to dress the door a bit by giving it a cross brace, similar to what you would see on the doors of old barns.
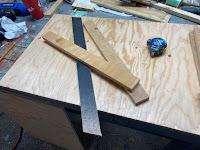
To create the cross bracing, I cut out three 2 inch wide strips to a length of 20 inches.
I then took one of the strips and cut opposing 22.5-degree angles on the ends of it.
I then placed the strips on the door in the shape of a "Z" pattern and attached them in place with 1-inch brad nails.
As I did with the workbench, I then painted the door.
To finish up the build, I attached the door to the workbench with two self-closing exterior hinges that I salvaged from an old entertainment center and installed a cabinet knob on the other end of the door.
With that last step, the workbench was complete.
I've found that the workbench is a perfect companion for the 3D printer stand and I've found it the perfect companion for those small jobs. A far better replacement for the kitchen table that I was using before!










No comments:
Post a Comment