Last week I ran through the trials and tribulations that I had in installing a new dishwasher. During the install, I kept grumbling about how I always seem to be replacing dishwashers every 5 years or so.
I've had so much practice in installing dishwashers, I am almost tempted to offer my installation services as a nice little side hustle.
Now that my new dishwasher was humming away in my kitchen, I was now faced with a rather forlorn old dishwasher sitting on my back deck.
I was actually pretty curious about what doomed it to my deck, so before it made one last ride in the back of my truck, I figured a little autopsy was in order.
Besides, who knows what kind of salvageable goodies I could find.
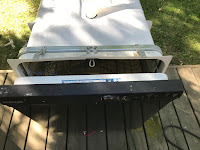
A quick inspection of the recently deceased showed a pretty typical dishwasher that you will see these days. The dishwasher had a plastic tub with a front door that contained a fairly sophisticated electronic interface, which hinted that some electronic goodies may lie within.
Tipping the dishwasher on its side exposed the mechanical heart of the machine with its collection of pumps, solenoids, and heating elements that managed the spraying and draining of water from the inside of the dishwasher.
I first focussed my attention on the components that managed to bring water into the dishwasher.
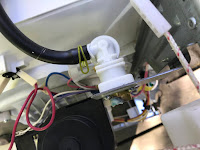
The first part I tackled was the solenoid valve that allowed the water to enter the dishwasher from the house plumbing. As I mentioned in my post on installing the new dishwasher, it this particular part that is the source of a lot of aggravation since there never seems to be a standard connection size for hooking these things up to the house plumbing, which always means an unexpected trip to the hardware store.
So I did take a certain amount of pleasure in ripping this off the dishwasher first.
Removing the solenoid is actually a pretty simple matter of removing the outlet hose from the valve by removing a clamp, unplugging its electrical connection, and freeing the valve from the dishwasher's chassis by removing a few screws.
Looking up the part number on the valve confirmed that indeed it is what it is, an on/off valve that acts like a water tap.
The solenoid was rated for 120 volts, however, which is a much higher voltage than I am comfortable in dealing with.
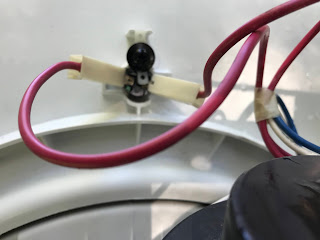
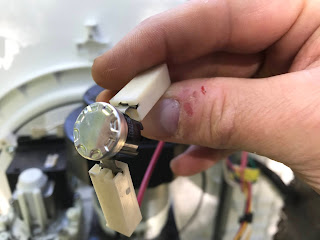
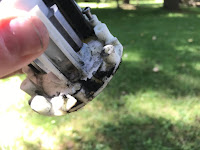
Underneath the valve, I found what appeared to be a sensor of some sort that was embedded into the side of the dishwasher tub. Removing the sensor was pretty easy, it was simply pulled from its seat in the side of the tub and the electrical connectors were removed by pulling the wires off of the sensor's connectors.
I couldn't find any markings that would identify the sensor. however, my suspicion is that it is some sort of temperature sensor used to check the temperature of the water inside the dishwasher. Figuring out what temperature the sensor is set for will need some further investigation.
Next, I tackled the drain pump for the dishwasher, This pump was located on the bottom of the tub, beside the main pump that drove the wash arms inside the dishwasher. The drain pump was certainly a lot smaller than the main pump, but I suppose that would make sense since the main pump needs to move a lot of water at fairly high pressure, while the drain pump has gravity giving some help in moving the water out of the dishwasher.
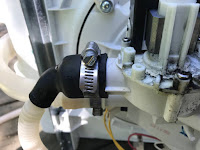
Removing the drain pump was a matter of removing the drain hose, which was held in place with a simple hose clamp and removing a few screws.
The pump is really pretty simple - it's just a motor that has a large impeller at the end of it, which makes it pretty useful for moving larger food particles down the drain.
It was a little crusty around the edges, but the motor looked to be in good shape.
Located beside the drain pump was another sensor that was embedded into the tub near the intake for the pump. I'm not entirely sure what the purpose of the sensor is, but removing the sensor was the same as the last one, I just pulled out of its socket in the side of the tub and unplugged the electrical connections.
Looking at the code for the sensor seemed to indicate that it's a turbidity sensor. Turbidity sensors measure the amount of light that is scattered by the suspended solids in water. As the amount of total suspended solids in water increases, the water's turbidity level increases.
With the smaller items removed from the bottom of the dishwasher's tub, the last thing to tackle was the main pump.
The pump was well secured into the bottom of the tube, which itself was secured in place with an O ring and some clamps to the main tub (quite frankly, this seems to be a recipe for a leak at some point)
To get at the pump I first removed the bottom of the tub by removing the screws that were securing the bottom in place.
The bottom, with the pump, included came out as a complete unit.
The pump was attached to the tub's bottom with a couple of screws. Removing the screws freed up the post that the washer arm was connected to which also revealed a water channel that included a check valve that used a solid plastic ball (similar to what you used to find in old school computer mice). This also freed up the pump which was easily pulled free from the tub's bottom.
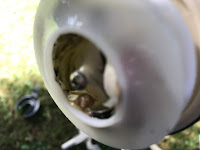
Taking a closer look at the pump's impeller uncovered the reason for this dishwasher's demise.
The impeller housing was just stuffed full of debris including some glass shards from a cup that had broke in the dishwasher some time ago.
Not only was this clogging the pump, it pretty much made a hash of the blades. This would explain why the dishwasher was making a lot of noise, but not doing much washing of dishes.
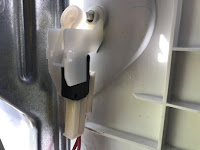
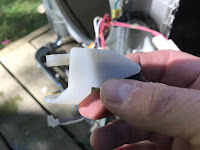
Before I moved on from the bottom of the dishwasher, I notice a small toggle switch that had served as a signal to indicate when the dishwasher was full of water. I could always use switches, so I quickly removed it too.
Flipping the dishwasher right side up again, I took a quick look at the dishwasher's door.
Considering there are some obvious electronics at play here, I was always amazed that the electronics on these things never get messed up considering that the electronic brains are literally inches away from a high-pressure stream of hot water.
Looking at the door, I noticed that the door itself was held together with a series of machine screws.
Removing the screws around the door's edges allowed me to pop off the outer door, exposing the goodies underneath.
The first thing I found was a slip of paper that was tucked into a slot on the inside of the door, What it was was a service data sheet that had a complete parts diagram, electrical schematics, and a comprehensive troubleshooting chart.
It would have been nice to have something like this located outside of the dishwasher, but I guess the manufacturer didn't want me doing my own repairs - I'll keep this in mind to check for it when my new dishwasher starts giving me troubles.
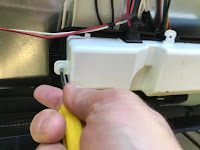
Next, I found a plastic box that was sealed with a number of screws that had some wires sticking out of it. I can only assume that the electronic brain was located within.
After removing the screws, my assumption was proved to be correct.
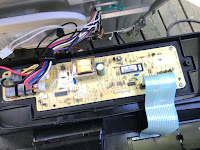
The circuit board seemed to be a pretty typical board in that it had a power transformer that converted the main house power down to 12 volts and a number of relays that switched on the pumps and valves.
The board also contain a logic circuit that was wired to the control panel on the front door.
There was certainly a good assortment of components that I could salvage - especially the relays.
Working my way towards the control panel, I was surprised to find that the panel itself was very thin since the panel did contain a number of buttons and status LEDs.
The panel was removed by carefully peeling it off the door like it was a piece of tape.
Once removed I saw that the switches and LED's were surface mount components that were encapsulated within the plastic tape.
An interesting find.
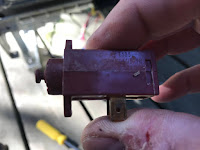
Finally, I liberated an electric solenoid that was used to open the soap dispenser.
And with that, the autopsy was complete. It was very much a learning experience and I was actually quite happy to actually diagnose what the issue was - something I will keep in mind with my new dishwasher and I did find a few secrets about the machine.
With my new found supply of parts, the old dishwasher will also be given a chance to live as something new.













No comments:
Post a Comment