As I may have mentioned previously, along with a fondness of making sawdust, I am also a bit of a radio nut.
As I sit here typing out this post, I have my trusty HF Amateur Radio transceiver (an Icom 718 if you're curious) and my digital VHF scanner (a Grecom) keeping me abreast of what's going on, both locally and internationally.
My scanner in particular is quite busy since it is always checking the frequencies for a large number of public safety agencies in my area. While I certainly enjoy being in the know of what's going on in my local area, I do find that I may miss something that has happened closer to home because the scanner is busy telling me about something happening over in the next county.
This is particularly true about activity that involves my local fire department, which is about a kilometer away from my house. There have been a few times where I missed a call out and did not know that there was something going on until I saw the fire trucks rushing by my house.
I really wanted to have some way of scanning full time the four call out frequencies that the fire department uses in my area but still keep tabs on the other frequencies that I am scanning. It didn't really make a lot of sense to buy another scanner just to monitor a handful of frequencies.
However, I did have a few spare SDR (Software Defined Radio) dongles sitting around from my Glider and Balloon tracking projects. Could I use these for a dedicated scanner for my fire department?
Doing some research into the matter, I found that it was something that could quite easily be done, all I needed was a Raspberry Pi and a little bit of software to make it happen.
My goal for this project is to have a small receiver that could sit on my shelf and just monitor the fire department frequencies. When there is any transmission on those frequencies, the traffic would be broadcasted out through a speaker and some sort of visual alert (like a blinking LED) would also be displayed to let me know something is happening.
But, to get to that point, I first needed to find out if I can receive any radio signals at all.
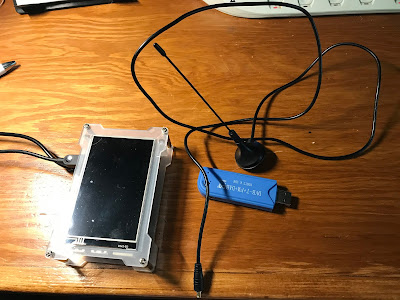
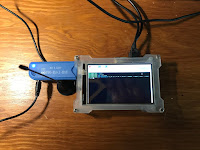
To start the process, I gathered up a Raspberry Pi (in this case I used my Raspberry Pi 4 with a touch screen), plugged in my SDR dongle (which in this case was a very generic "DVB-T+FM+DAB" dongle that I picked up for less than $20 on eBay) and loaded up a current version of Raspbian onto the Pi.
While a "lite" version of Raspbian would have worked fine, I decided to take advantage of the extra horsepower of the Pi 4 and loaded up a full GUI version of Raspbian.
Once the Pi had booted up. I opened up a terminal window on the Pi and did a full update of the operating system by entering these two commands at the command prompt:
sudo apt-get upgrade
sudo apt-get upgrade
Once all the updates were done on the operating system, I next needed to install the application software required to communicate with the dongle. A pretty common suite of software that is available for free is provided by RTLSDR.com. This suite of software contains the correct drivers to access an SDR dongle and includes a number of utilities that allow you to receive a variety of different signal types. It will be one of those utilities that I will be using to scan the fire department frequencies.
To install the RTLSDR software, I just entered the following command at the command prompt:
sudo apt-get install rtl-sdr
After the software was installed I then rebooted the Raspberry Pi.
After the Pi rebooted, I opened up the terminal screen once again. The SDR utilities are only accessible via the command line of the terminal window
To access the utilities, I first entered the following commands to put me into the directory where the utilities are stored.
cd /
cd usr
cd local
cd bin
Entering the ls command at this point will display a number of SDR applications that are available for use with the dongle. However, the particular application that I was most interested in was called rtl_fm
Rtl_fm, as the name implies, is a utility that is used to receive FM broadcast signals through the dongle. While the main purpose of this utility is to receive your typical FM broadcast station, since my local fire department also uses an FM, this utility should work well for this project too.
As I mentioned earlier, this utility is a command-line interface and uses a number of parameters that you also enter at the command line to indicate what settings you want to use to receive the signals that you are after.
There are quite a few things that you can tweak with this application based on the available parameters that you can set:
- -f frequency_to_tune_to [Hz]
- -s sample_rate
- -d device ID (default: 0 - because we are usually just using one dongle)
- -g tuner_gain (default: automatic)
- -l squelch_level (default: 0/off)
- -o oversampling (default: 1, 4 recommended)
- -p ppm_error (default: 0)
- -E set lower edge tuning (default: center)
- -N enable NBFM mode (default: on)
- -W enable WBFM mode (default: off)
- -r output_rate
- -M Mode (AM, FM, etc.)
What is of most interest to me here is that I can use the -f parm to set the frequencies to scan and I can set a squelch level so that I can have the receiver wake up whenever there is any activity on one of the frequencies.
As a test, I decided that I just wanted to listen to one of my local FM broadcast stations.
The station that I wanted to here was located at 105.3 Mhz. so I entered in the following command at the prompt:
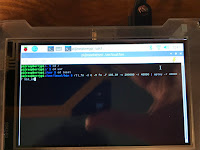
rtl_fm -d 0 - M FM -f 105.3M -s 200000 -r 48000
Basically, I told rtl_fm to access device 0 in FM mode and receive 105.3 Megahertz with a sample rate of 200000 hertz and an output rate of 48000 hertz
Hitting enter caused the screen to show some activity - a lot of it had the appearance of chicken scratch, but when I plugged some headphones into the Raspberry Pi's audio jack, I wasn't hearing anything.
Doing some digging, I found out that the output of the rtl_fm application needs to be routed to the Pi's soundcard through the Raspbian aplay utility.
Aplay is a command-line audio player and is basically used to play audio on command-line interface.
Since it is also a command-line application, it too has a number of parameters that can be used to configure how you want aplay to work however the key one that I needed was -f (frequency) parm which needed to match the output frequency of rtl_fm
To run rtl_fm but pipe the output to aplay I entered this command:
rtl_fm -d 0 - M FM -f 105.3M -s 200000 -r 48000 | aplay -r 48000
I started to hear some tunes coming through the headphones.
The next experiment I wanted to try was to see how loud the tunes would be if I piped them through an external speaker.
I wired up a small speaker to a phone plug, plugged it into the Pi's audio jack, and gave it a listen.
Verdict: not very loud.
I definitely need to add some sort of amplifier into the mix.
One thing I did notice was the tunes suddenly stopped halfway through the test. This was actually expected since I had read that this was a common problem with Rasperry Pi's running rtl_fm, but I was really not expecting it with the increased horsepower of a Raspberry Pi 4.
The issue is that the output frequency rate can be too great for the Pi to handle.
When I found when I ran with this configuration:
rtl_fm -d 0 - M FM -f 105.3M -s 200000 -r 12000 | aplay -r 12000
the playback was dead reliable, albeit with the audio quality was a little lower than before, but since I am planning on listening to public safety transmissions, high-quality sound is not a priority.
Now to make it louder...


No comments:
Post a Comment