With everyone staying home more due to the situation that has been happening in the world this year, there seems to be a bit of an explosion of people letting their inner chef out and trying their hand at making home-cooked meals.
This really became apparent when I noticed a definite shortage in the grocery stores on things like flour and yeast. There certainly seems like there is a lot of bread being baked recently.
Another thing that I have noticed, actually long before the pandemic hit, that that there has been a renewed interest in making meals with pressure cookers.
Unlike the pressure cookers of my Grandmother's time, which resembled something that would have been more at home in a science laboratory, the pressure cookers of today look downright sleek and high-tech with custom programs built-in for handling almost anything you would which to make.
Pressure cooking is the process of cooking food at high pressure, employing water, or a water-based cooking liquid. High-pressure limits boiling, and permits cooking temperatures well above 100 °C to be reached, meaning that foods cook much faster with pressure cooking than with other methods
The most common pressure cooker being sold these days is the "Instant Pot" but there are a lot of other cookers on the market that function in exactly the same way.
A few years ago I bought a no-name pressure cooker mainly to do some canning, but recently I also started to use it to make some nice and easy one-pot meals.
Recently I was cleaning the cooker when the relief valve (which is a safety device that is used to release pressure if the internal pressure of the cooker gets too high) fell out of the lid and fell down the drain in my sink.
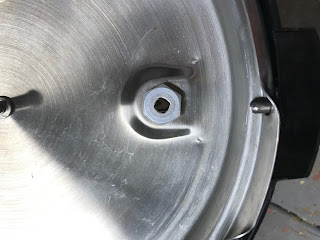
This meant that my pressure cooker now had a small hole in the top of its lid - not an ideal situation for maintaining pressure.
As it seems to be the case in our disposable world today, a quick search online for replacement parts made it quite clear that it was more cost-effective to buy a new cooker than repair the old one.
After a quick trip to my local store, I was able to start cooking again, but in the meantime, I still had this old cooker.
Perhaps a little dissection was in order - just to see what secrets it held - and maybe to see if we can find some goodies too for future projects.
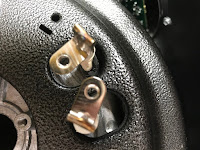
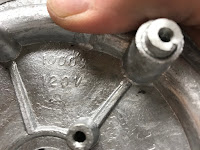
The first order of business was to take a look at what doomed the pot, to begin with. In the handle of the pot was a metal pin that was seated into a slot in the pot's lid. The pin was secured to the lid with a rubber grommet that was designed to compress when the pressure inside the pot rose above a certain level. The compressing of the grommet pulled the pin down the slot, creating a hole for the excess pressure to escape.
The last time I used the pot, the grommet fell off the pin, which also freed the pin from it's home in the pot. Sadly I didn't notice that until I heard an odd clunk in the drain of my kitchen sink.
After a few seconds of mourning, I carried on with my inspection.
The cooker is typical of what you find in the stores these days. There is a front control panel that has a timer display and a series of buttons that would allow you to set the cooker to any number of settings.
The top of the cooker is a fairly robust bit of metal and is fairly well constructed (relief valve excepted), which I would fully expect for something that operates under a fair bit of pressure. The inside of the lid had a sheet metal liner with a rubber gasket (for sealing the pot for pressurization) that was removable to make cleaning easier.
With the exterior inspection out of the way, it was time to look inward.
Flipping the pot over, the first thing that I saw was 2 screws, which I duly removed.
Removing the screws didn't really seem to accomplish anything, so I took a closer look.
In front of the location where the screws had been installed there was what seemed to be a small hatch with a little slot that looked like I could use a screwdriver to pry under to open up a hatch.
Using a small slotted screwdriver I pried open the hatch.
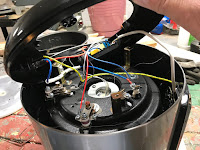
Inside I noticed what seemed to be a fairly standard looking power supply with connections going to what looked to be some sensors, the heating element, and the control panel on the front of the pot.
To further get at the innards of the pot, I needed to remove the outer plastic ring of the pot's bottom, which were attached to the pot with more screws.
Removing the screws along with some gentle prying, I fully exposed the bottom of the pot.
I did have to wait for my apprentice to hand me the screwdriver though,
I turned my focus to the power supply, which was attached to the plastic ring that I had just removed.
In order to properly get at the power supply, I needed to first disconnect all the wiring from the supply.
At this point, I was starting to gain a bit of an appreciation of how well this pressure cooker was built.
All the parts for the cooker were easily accessible and could be easily removed with just a screwdriver.
At this point, I found my first reusable part.
The power outlet for this pressure cooker was a fairly standard 3 connectors 120-volt outlet that is more commonly found in your standard desktop computer. The outlet was easily removed by pulling off the spad clipped wires and removing the outlet from the base of the cooker by removing a couple of clips.
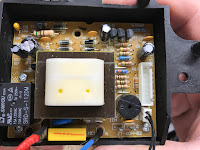
I took a closer look at the power supply.
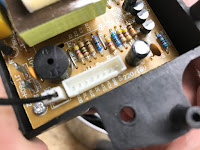
For the most part, it was a fairly bog-standard power supply, but upon closer inspection, I noticed that the circuit board was very well labeled with all the parts identified on the board including the values for all the pins on the data connectors on the board.
For a pretty cheap pressure cooker, this is actually a highly repairable design.
Looking at the bottom of the pot, I took a closer look at some of the sensors that were still attached.
The first thing I noticed was 2 mechanical pressure switches that looked to be very well constructed.
Of course, I removed them for future use.
Next, I removed a spring-loaded sensor that was located in the center of the pot's bottom. This sensor maintained direct contact with the cooking container and my first assumption was that it contained some type of temperature sensor for controlling the heating element.
The sensor was removed from the pot with a couple of screws.
Looking closer to the sensor housing, I noticed that the sensor itself was encapsulated in some type of rubber compound. Removing the compound revealed some sort of sensor that looked like a bit of a diode.
My assumption is that the sensor was some sort of temperature switch that turned the element on or off.
Finally, I removed the pressure cooker's heating element from the bottom of the pot by removing the 3 screws that were attaching it in place.
The heating element was pretty a robust-looking part that was made from cast iron and was rated for 1000 watts based on the information that was stamped on it.
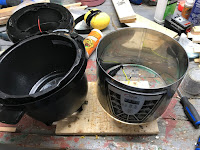
Since I removed all the screws from the bottom of the pressure cooker, the top of the cooker was separated from the body of the cooker and was easily lifted out, exposing the control panel.
Taking a closer look at the control panel, I again noticed that the overall design philosophy continued with the panel being held in place with screws.
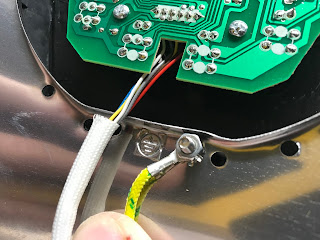
I also noticed another nice touch in the design of the pot - a small tag was attached to identify the mounting point for the ground connection.
Removing the control panel uncovered still more goodies, including something I had never seen before.
The circuit for the panel was also well marked and contained a number of button switches and an easily salvageable LED display that I would be able to use for a future project.
However, the real surprise was the LED's that were used to indicate the function setting of the cooker.
These were LED's that had extremely long lighting elements. This is something I had never seen before and was obviously a specialized part. I am not sure why they chose these when a normal red LED would have likely done the job, but all the same, I am quite excited to see these.
With that, that completed the autopsy of the pressure cooker.
For a fairly simple device, I was really impressed with the haul of parts that I got from it, in particular, the specialty parts like the pressure switches and the unique red LED's
So now I have a better idea of what makes these things tick. Time for me to make some ground turkey pasta in my new pressure cooker (yum!).














No comments:
Post a Comment