After using my little NEJE laser engraver for a little while and not managing to permanently blind myself by staring at the laser as if I was a moth to a light bulb, I figured that I could graduate up to something a bit more deadly powerful.
After reviewing the offerings on hand on Amazon, I settled on a 2.5-watt engraver that had the magic mix of being cheap but having very good reviews by what seemed to be actual humans (though I do hear that the bots are starting to get pretty smart these days 😀)
The laser also had a much larger engraving surface - which really opened up the project possibilities that I could consider.
Eventually, the laser arrived, as always, in the form of a box full of tiny pieces that I needed to assemble before I can do anything useful.
I was quite impressed with the format of the assembly instructions that were provided. I was initially prepared to try and decipher printed instructions that were written by someone whose first language was not the same as mine. Instead, I got a USB stick that contained a series of videos that showed someone assembling the laser. All I had to do was watch the video and pause it every once in awhile as I assembled the laser. Very soon I had a fully assembled and functioning death machine.
I will say that this laser is definitely no joke, it is a lot more powerful than my NEJE, and you need to wear the proper laser goggles when using it (thankfully, they were also supplied with the laser).
To try out the new laser, I wanted to make something that was pretty simple, but useful. Whenever I visit a shop that sells "gift items", I always see these little wooden signs for sale that have little cute sayings or graphics. Around here "mud season" occurs on the spring and fall and a constant problem here is that occasionally mud does get tracked into the house - so why not make a little sign to remind people to wipe their feet as my first project.
The software for the laser is pretty simple to use, as long as you have a fairly sharp black and white image to work with, the laser can engrave the image with no trouble.
To create my sign I first opened up my copy of OpenOffice Draw (though any graphics software will work fine) and laid out the design that I wanted.
Once I was satisfied with the design, I saved it as a jpeg file.
I then headed back into the shop to look for materials to engrave my sign on.
In my scrap wood bin, I had a number of small strips of wood of different types that were about 10 inches long.
Using that 10-inch limitation for the length of my sign, I determined that a 5 X 10 sign would make a perfect size to hang on my front door.
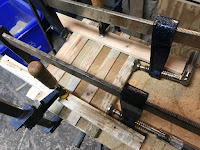
Gathering up the various strips that I had on hand, I made up a 5 X 10 board and glued and clamped the wood strips together,
Since the strips were of differing thickness, I did need to run the board through the planer a couple of times.
Next, I trimmed off the edges of the board to square it up and then put on a decorative edge with the router.
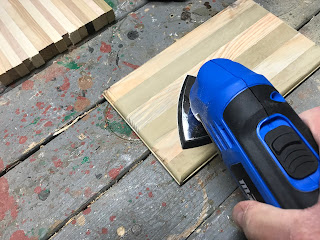
Finally, I gave the board a good sanding.
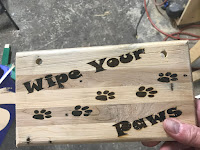
Returning back to the laser with my wooden board, I loaded the jpeg of my design to the laser's software, positioned the board to the correct place on the laser bed, and pressed the "Send" button.
The laser proceeded to burn a perfect copy of my design into the board.
To hang the sign, I did have a few options available such as routing a slot in the back of the sign for hanging a nail or attaching a metal picture hanger clip.
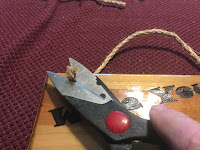
I did want to make the sign as rustic as possible, so I opted to hang the sign with a length of hemp twine that I had on hand,
To attach the twine I first drilled 2 1/4 inch holes on each end of the top of the sign.
After that, I then gave the sign a couple of coats of spar varnish to protect it from the elements, (since it will be hanging on an exterior door).
When the varnish was dried, I then cut off about an 18-inch length of twine.
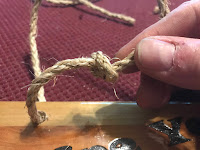
I inserted one end of the twine through one of the holes from the back of the sign and made a simple knot at the end of the twine, with the knot being located on the front of the sign.
Next, I did the same for the other hole in the sign.
When the second knot was done, I finished up by trimming any excess twine from the end of the knot.
With that last step, the sign was now complete.
This was a really nice first project for my new laser engraver and the nice thing is that I can create multiple versions of this sign (or any sign for that matter) to make as gifts, or, if you have checked out my online store, as a nice little side hustle.
As I get more comfortable with the laser, I will likely be showcasing other projects that I could create with it, and maybe even do a bit of a review of the engraver itself.
One thing that has really excited me is that this is almost the perfect fusion of electronics and wood.










No comments:
Post a Comment