After about 10 years of faithful service, my Keurig coffee maker finally expired from old age.
Normally this would be a period of great sorrow since that meant that I was no longer able to get the life-sustaining elixir that I disparately needed.
Thankfully machine died just in time for Christmas and I welcomed a new addition to the family just in time since I was just on the cusp of experiencing caffeine withdrawal.
With my new machine now performing its life-saving duties, the question became what to do with my old Keurig?
If you have been a fairly regular reader, you should be aware that I always like to salvage things that would otherwise end up as e-waste, So I wanted to see what I could do to have my old Keurig live on in a future project.
If you have been a fairly regular reader, you should be aware that I always like to salvage things that would otherwise end up as e-waste, So I wanted to see what I could do to have my old Keurig live on in a future project.
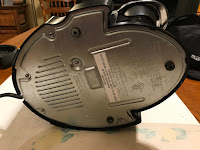
Looking over the dearly departed, I determined the best place to make the first incision was at the bottom of the machine since that was the only place that seemed to have external fasteners.
Thankfully the bottom was attached with Phillips screws (most of the time I tend to find Torx or some other unique type of fastener - it's as if the manufactures of kitchen appliances don't really want people messing with them!). A few minutes with a screwdriver and the bottom of the machine was exposed.
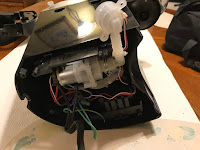
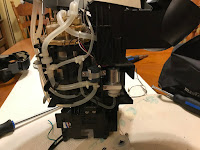
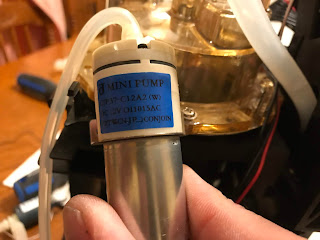
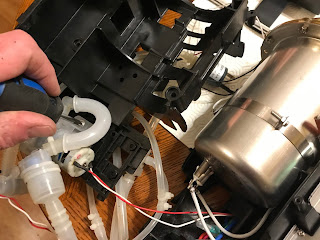
Upon initial investigation, I immediately saw a mass of surgical tubing and what looked to be a pump run by a 12-volt motor, used to pump the water from the Keurig's water reservoir to the hot water tank. The fact that a low voltage motor was used for this function was an encouraging sign that I would find a lot of reusable goodies within.
The additional investigation also showed that the outer shell of the machine as a multilayered affair, sort of like a plastic onion.
To remove the first layer (the reservoir receiver and coffee cup tray in this case) I had to remove the reservoir inlet port from the tray by removing a couple of Phillips screws, followed by a couple of screws on the tray itself and just popping the tray off.
When removing the inlet port - I noticed that there was a bright blue LED attached (used to indicate when the reservoir needed filling) - my first useful part salvaged!
With the tray removed, I really wanted to get at that pump next - and that's where I hit the first snag.
The pump was attached to the chassis of the machine with 2 Phillips screws that were tucked in on top of the pump, deep inside the body of the machine. That that meant was that in order to remove the pump. I needed to come in from the top to get at the screws, meaning I had to remove a lot of stuff before I could free that pump.
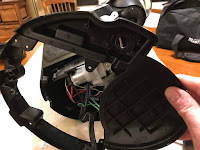
Looking at the Keurig's case, I saw that it had an outer housing that contained an inner plastic skeleton that held all the mechanical bits of the machine. So, like an onion, I focused on removing the outer skin first.
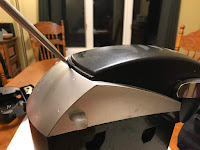
Starting at the top I removed the cover that contained the mechanism that held the K cup in place.
This part was made from plastic that was held into place with 2 screws in the front of the mechanism and was snapped into place at the rear.
In order to free the cover, I removed the screws and popped the rear off with a screwdriver.
Once I had everything undone, the cover just lifted off.
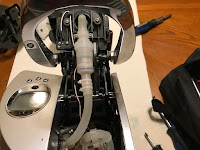
With the cover removed I found some more surgical tubing and what looked to be a check valve (which testing, later on, proved to be correct). I wasn't sure why there needed to be a check valve here unless it was needed to prevent air from being sucked into the hot water container while it was being filled by the pump at the bottom of the machine.
Removing a couple of screws and with a gentle pry with a screwdriver to remove the tubing from the hot water container, and the check valve was free)
Working my way down, I next tackled the top deck of the Keurig which included the controls for the machine and a really nice looking LCD display. Obviously, the brains of the operation resided there, so I needed to be very careful.
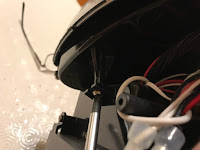
A quick look around showed 2 screws securing the top, which I dutifully removed however the top still did not want to move, which suggested that the plastic top was snapped into place.
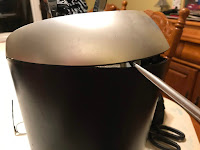
Some careful prying with a screwdriver confirmed that suspicion and I eventually got the top off with no damage
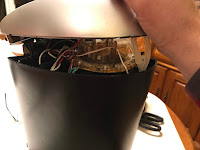
At this point it was pretty easy to slide off the outer case of the machine, exposing the goodies within.
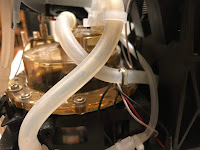
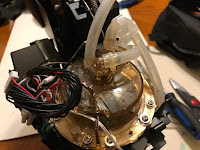
A quick inspection showed a variable rats nest of surgical tubing but also what looked like a couple more low voltage pumps and a stainless steel vessel that was used to heat and store the hot water.
Returning to the top of the machine, I wanted to remove the brain box and recover that sweet LCD screen. Upon initial inspection, I noticed that a small bit of tubing was connected to the control board from the stainless steel vessel - my suspicion is that it is feeding a pressure sensor of some sort on the board.
To remove the board I just needed to remove a few screws.
Freeing the circuit board, I could easily see the LCD screen plus a few micro switches, LEDs, and of course that sensor on the bottom.
After removing the tubing from the vessel, I put the board aside and moved on.
Moving down the assembly I found a compartment with a mass of wires coming out of it - the natural assumption was that this was where the power supply for the machine lived (the fact that the 110-volt power cord was also going into this box was a bit of a clue too).
Removing the screws holding compartment closed confirmed my suspicion since I was greeted with a small board with a few toroids, a large diode, and a very large power capacitor.
But it didn't seem like there was enough hardware for transforming power, so when I removed this small board, I found yet another compartment underneath it, which then revealed a more traditional power supply board, with the largest heat sink that I had ever found on a MOSFET transistor.
After removing the power supply boards, I then returned to what I thought were two pumps on the side of the assembly.
The screws holding the pumps in placer were removed and I had a closer look at what I had
The first "pump" turned out to be a 12-volt pneumatic solenoid valve.
From Wikipedia:
Solenoid valves are used in fluid power pneumatic and hydraulic systems, to control cylinders, fluid power motors or larger industrial valves. Automatic irrigation sprinkler systems also use solenoid valves with an automatic controller. Domestic washing machines and dishwashers use solenoid valves to control water entry into the machine. They are also often used in paintball gun triggers to actuate the CO2 hammer valve. Solenoid valves are usually referred to simply as "solenoids."
Solenoid valves can be used for a wide array of industrial applications, including general on-off control, calibration and test stands, pilot plant control loops, process control systems, and various original equipment manufacturer applications.
So I definitely had something cool that I could use for a future project.
Also something cool.
Even though I was harvesting all this neat stuff, I still wasn't getting any closer to the screws that were securing the pump that I found at the bottom of the machine.
I was also getting pretty stoked about the stainless steel vessel that was used to store and heat the hot water too, however they were both well cocooned inside the plastic assembly.
Taking a closer look at the plastic assembly, I noticed that it was actually two pieces that were held in place with 4 screws.
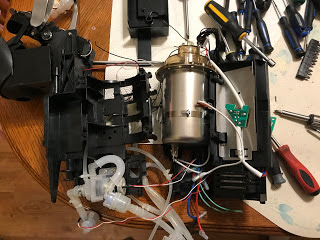
Removing the screws opened the assembly up like a clamshell and all the goodies inside were easily accessible.
At this point, I was finally able to liberate the water pump and the stainless steel vessel just lifted out.
While I was at it I also harvested all the tubing.
In the end, I got a lot of very interesting parts from the Keurig that would be excellent fodder for projects.
In the end, I had:
- A 12-volt water pump
- A 12-volt solenoid valve
- A 12-volt air pump
- A check valve
- A handful of LED's
- LCD screen
- Various lengths of surgical tubing and fittings
- Various screws
- Miro and magnetic switches
- A stainless steel container with a heating element
I am at the moment toying with ideas for the water and air pumps - I am hoping I could do something that used solar energy as a power source,
The solenoid is a bit of an unexpected find - as always I'll keep you posted on what I end up doing.



















No comments:
Post a Comment