I was looking for something that I could build to take advantage of the laser engraver that I had recently purchased. I really wanted to find an excuse to etch some really nice detailed images as part of some sort of wood project.
The laser engraver really gives me the ability to really make some very elegant looking items, but the question was what to make...
A few weekends ago I had a chance to check out a couple of craft shows in my area along with my significant other. I don't really go to these shows to really buy anything, but rather they are basically scouting missions for me to find ideas for potential projects.
At the shows, I did find a lot of different things on sale that utilized laser engraving, but alas a lot of the items for sale were fairly large, far larger than anything my engraver could tackle.
However, I did see a lot of smaller items, like Christmas ornaments and drink coasters that were laser engraved.
Intrigued by what I saw, I remembered that I had a rather large assortment of small wood scraps leftover from other projects lurking in my scrap box. A good majority of those pieces included scraps of Eastern red cedar and maple which have really attractive wood grain patterns and colors.
Once I got back home and back into the shop I got right to it.
As my first laser engraver project, I settled on building drink coasters. In keeping with the wood theme, I decided that engraving woodcut images of maple, willow, poplar and pine trees on the coasters. In order to keep things neat when the coasters aren't being used, I would also build a little caddy to store them in.
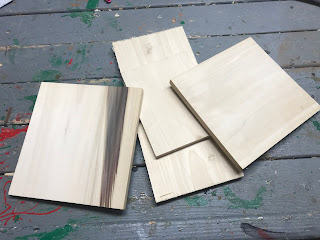
I first started with some 1/2 inch pieces of poplar that I obtained from a local furniture maker that was selling them for camp firewood.
I took a couple of the slabs and cut out five 4" X 4" squares.
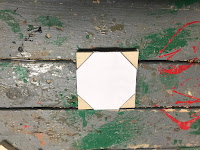
Next, I cut out an octagon on a piece of cardboard and traced the outline of the octagon out on the 4" X 4" wooden squares.
Before I went any further with the coasters I first needed to build a jig to allow me to cut my wooden squares on their corners with my table saw as safely as possible.
To build my jig, I took a 12" X 6" piece of plywood and nailed 2 strips of wood on the top of it so that the strips formed a "V" in the middle of the plywood at a 90-degree angle. With this type of jig, the square wood piece that I am cutting sits in the "V", allowing me to cut the opposite corner of the square.
When I put a square wooden piece in the jig and line up my saw blade with the line that I traced on my wooden piece, I can quickly cut it out into a perfect octagon.
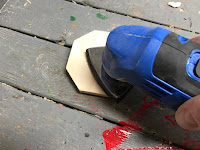
Once I finely sanded all the sides and edges of the octagons, I was ready to do some laser engraving.
Taking 4 of the octagons, I when over to my laser engraver and I etched a drawing of a tree in the center of the each.
With the 4 coasters engraved and ready for finishing, I turned my attention to the caddy for the coasters.
The base of the caddy will be the fifth octagon that I had cut out earlier. In order to make the caddy as attractive as possible, I made sure that the base had nice wood grain details in order to have that unique look. To accentuate the caddy a bit more, I also chose some scrap pieces of Eastern Red Cedar to serve as the sides and base of the caddy.
I first started off by cutting the cedar into 1 inch wide strips.
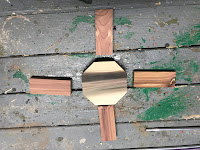
I started assembling the caddy by gluing a 4-inch length of cedar along the bottom to of the octagon so that the cedar strip was flush along two sides of the octagon.
Next, I cut two 1.5 inch cedar strips and glued them to the octagon so that they were also flush along opposing sides the octagon such that the cedar pieces looked like a plus sign on the octagon.
Next, I took another 1-inch wide strip of cedar and cut it into four 3.75 inch long pieces, to use as the sides of the caddy.
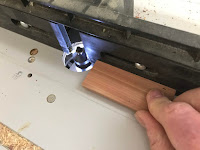
As an added decorative touch I also put a cove edge along the 2 long edges on one side of the cedar strips with a router.
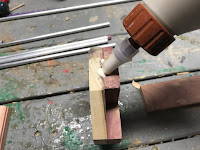
To assemble the caddy I gave the cedar strips a quick sanding and attached them to the caddy base with some wood glue, making sure to attach the strips to the cedar cross members on the baser of the caddy.
I then held everything in place with clamps until the glue dried.
Once the glue had dried I then gave the caddy and the coasters a couple of coats of spar varnish, making sure to give everything a quick sanding with fine steel wool in order to keep surface nice and smooth.
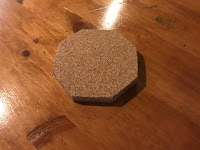
After the varnish dried the last step is to attach cork underpads to the bottom of the coasters. To do that I applied some contact cement to a section of sheet cork and placed the bottoms of the coasters on top of the cork and allowed the cement to cure.
Once the contact cement had dried, I then trimmed the excess cork away from the sides of the coasters with some scissors.
And with that, the coasters were finished.
This turned out to be a very easy, but very attractive build. I was able to make a number of these as a batch and I've found them to be very handy to have on hand whenever I needed to give someone an impromptu gift.
I was finally quite happy to find a useful thing to use my new laser engraver with!













Awesome wood working article!
ReplyDeleteThanks!!!
DeleteAl M, you're doing a great job on it. If you want to know even more information about wood working theme, I can recommend this resource ( url: https://www.woodroutersreviews.com/best-plunge-router/ ). This is website, where author explain how to choose the right wood router for any type of wood processing work.
ReplyDelete