Sunday, December 27, 2020
Scrap Wood Phone Charger
Sunday, December 20, 2020
Easy To Build Bike Repair Stand Revisited
Sunday, December 13, 2020
Tis the Season to Be Busy
Sunday, December 6, 2020
A Really Simple "Dishwasher Clean" Signal
We have a bit of a strange problem in my house when it comes to the dishwasher. The rule here is the one person loads and turns on the dishwasher while someone else is tasked with the job of unloading it.
A bit of an ongoing issue has started to happen with the recent installation of the new dishwasher. With the old dishwasher, everyone knew when the dishes were being washed based on all the racket that was coming from it. Since the new dishwasher is so quiet, you really don't have any way to know when the dishes are clean, which causes a bit of tension when it's discovered that the dishwasher is still full of clean dishes several hours after being washed.
I suspect that this is a fairly common problem in a lot of households since I have noticed that you can quite easily get magnets that you can stick on your dishwasher that say "Clean Dishes".
While I suppose I could easily get such a magnet to stick on our dishwasher, but since we tend to be a bit pre-occupied with other things, I have my doubts that a plain old magnet is just not going to get much attention around here.
We needed something that would be a bit more eye-catching.
Saturday, November 28, 2020
LED Mood Light
Sunday, November 22, 2020
A Simple Public Safety Radio Scanner with the Raspberry Pi - Putting It All Together
Sunday, November 15, 2020
A Simple Public Safety Radio Scanner with the Raspberry Pi - Building a Cabinet
Sunday, November 8, 2020
Building a Tablet Computer Stand
Sunday, November 1, 2020
Building an Instagram Posting Bot
As a result of the 35mm film slide converter project that I had built a while back, I have managed to digitized a good number of film slides. The tragedy of all this is that while I definitely enjoyed looking at and preserving images that haven't been viewed in decades, I didn't just want to have them be just stored away again on some hard drive, only to be faced with being obsolete and lost to time again in another 10 or 20 years when technology moves us in a direction that I can't even conceive of now.
Instead, I wanted to somehow share these treasures with the world. I started out by setting up a new webpage, "A Slide A Day" where I released a new photo each day with the capability of loading up several years worth of photos - so theoretically, if something catastrophic ever happened to me, I can pretty much guarantee that this website will continue to serve up new pictures way into the future.
While the website is a nice archive for the photos. it may not ever get the broad audience reach that I think these photos deserve.
While trying to figure out this quandary, I happened to chance upon Instagram. I knew that Instagram was a fairly popular photo-sharing app, but I didn't really pay a whole lot of attention to it until now.
When I looked into Instagram a bit more, I was actually quite intrigued by how easy it was to share a photo with a large audience.
The problem that I had with Instagram was that it was very much focused on people that used smartphones, so much so that the only way that you can post a picture on Instagram is via a smartphone. If you pulled up Instagram on a Windows-based computer web browser, you can only view pictures, not post them.
The other issue was that Instagram was very much an "in the moment" type app - meaning that you could only post in realtime. You do not have the capability to schedule your posts ahead of time.
This was a bit of a problem for me since I really didn't want to have to stop what I was doing at some point during the day and remember to post something - I really want to have a bunch of pictures loaded up in a folder and just drip-feed pictures at a regular daily schedule - publish "a slide a day" like the name of my site suggested.
Sunday, October 25, 2020
Dishwasher Autopsy
Sunday, October 18, 2020
A Simple Public Safety Radio Scanner with the Raspberry Pi - Landing on a Permanent Solution
Now that I finished my dishwasher installation, I was now able to swing my attention back to my scanner project.
Since I had now ruled out my Raspberry Pi Zero as a credible platform for my radio receiver, I had to take another look at my Raspberry Pi 4 as the foundation for my receiver.
The Pi 4 had certainly a lot more horsepower at its disposal and as an added bonus I also had a touch screen attached to it, so this gave me an opportunity to try to have some sort of display as part of the receiver, versus just having a plain box which was my original plan.
The first problem that I needed to attend to was the issue that drove me to the Pi Zero in the first place.
I needed to figure out some other way to get sound from the receiver without that infernal hissing noise that I had from the phono plug output when the receiver is waiting for radio transmissions.
The solution for that problem came to me rather by surprise during my last scouting mission at the neighborhood surplus store.
Sunday, October 11, 2020
Installing a Dishwasher
I had to take a bit of a break from the radio scanner project to attend to some urgent house "repairs".
Granted, with a family of four and both parents working, the dishwasher is in almost daily use, so it does get quite a workout at our house. But like clockwork, at the 5-year mark, it always starts getting a little tired, making very unpleasant noises, and the dishes almost seem to come dirtier than when they went in.
Inevitably, the cause of all the misery is some part that, when including the labor to install it, costs almost as much as what I had paid for the dishwasher originally.
This is all rather frustrating since I don't seem to have the same issue with the other appliances in the house. My washer and dryer are both pushing 20 years now and other than a new heating element for the dryer. they are both working well. The same goes for the fridge and stove. Yet I am looking at my 4th dishwasher since I bought my house.
On the bright side, I have gotten a bit of practice on installing dishwashers, so I can usually get a new one installed, up and running within a couple of hours.
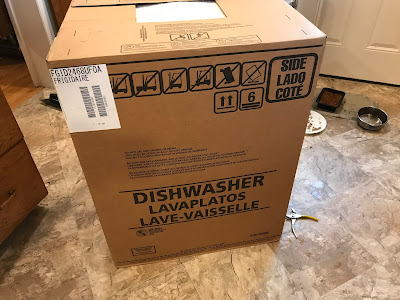
So, with a brand new dishwasher sitting in a box in the middle of my kitchen, I started work.
Sunday, October 4, 2020
A Simple Public Safety Radio Scanner with the Raspberry Pi - Part 3 - Trying to Downsize
When I tried to run the SDR in "idle" mode by turning the squelch setting on the rtl_fm application way up, I was still getting a fairly load hissing noise coming from the speaker when I was fully expecting silence. The issue stemmed from the way the sound circuit is configured for the 3.5mm phono plug on the Pi. Due to the size and circuit restraints of the Pi, there isn't a "true" sound card running built-in, meaning that the sound will truly never be high quality. Apparently having a constant hiss when there is no audio output is quite common.
One option in resolving that is to plug in a dedicated USB soundcard which can be easily bought online for a few dollars, however, when I was doing my research I noticed that you could also use a Raspberry Pi Zero to create fairly decent audio by using its GPIO pins plugged into a pretty simple circuit (the Raspberry Pi Zero doesn't have a built-in sound port)
I actually liked the idea of using the Pi Zero since it would give me the opportunity to really reduce the size of my scanner. As luck should have it, I also had a Raspberry Pi Zero on hand.
To have the Pi Zero be able to connect to my amplifier, I needed to build an interface circuit that will act as a bridge between the Pi and the amp. This bridge, usually referred to as an audio HAT is actually a pretty common add on that you can buy from a lot of suppliers, however, when I came across a video by Tinkernut, I found that I could easily build my own audio HAT.
Sunday, September 27, 2020
A Simple Public Safety Radio Scanner with the Raspberry Pi - Part 2 - Building an Amplifier
Sunday, September 20, 2020
A Simple Public Safety Radio Scanner with the Raspberry Pi - Part 1 - Receiving Signals
As I may have mentioned previously, along with a fondness of making sawdust, I am also a bit of a radio nut.
As I sit here typing out this post, I have my trusty HF Amateur Radio transceiver (an Icom 718 if you're curious) and my digital VHF scanner (a Grecom) keeping me abreast of what's going on, both locally and internationally.
My scanner in particular is quite busy since it is always checking the frequencies for a large number of public safety agencies in my area. While I certainly enjoy being in the know of what's going on in my local area, I do find that I may miss something that has happened closer to home because the scanner is busy telling me about something happening over in the next county.
This is particularly true about activity that involves my local fire department, which is about a kilometer away from my house. There have been a few times where I missed a call out and did not know that there was something going on until I saw the fire trucks rushing by my house.
I really wanted to have some way of scanning full time the four call out frequencies that the fire department uses in my area but still keep tabs on the other frequencies that I am scanning. It didn't really make a lot of sense to buy another scanner just to monitor a handful of frequencies.
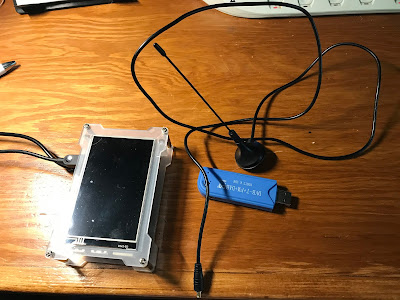
However, I did have a few spare SDR (Software Defined Radio) dongles sitting around from my Glider and Balloon tracking projects. Could I use these for a dedicated scanner for my fire department?
Sunday, September 13, 2020
A Wee Life-hack - Making a Simple USB Battery Adapter
Sunday, September 6, 2020
A Monthly Surprise in the Mail - Checking out a Kiwi Crate
Sunday, August 30, 2020
The Necessary Evil - Shop Maintenance
Last week I was ripping some stringers from a pallet for a new project that I was working on when my table saw made a bit of a clunk and shot out a couple of sparks - it would appear that I had forgotten to remove a nail from the stringer before I started cutting.
Obviously, the saw blade didn't really like that too much and proceeded to tell me this by making an absolute mess of the cut on the next board that I ripped.
Effectively I wrecked the blade and it needed to be replaced.
Changing a saw blade on a table saw is a fairly straight forward affair of loosening the nut that attached the blade to the spindle of the table saw's motor, except for a slight twist.
If you tried to just take a wrench to the nut, you will quickly find that the blade will just spin freely as you turn the nut. No matter how dull the blade is, it is still not a good idea to have something like that near fingers that are in close proximity, nor can you just hold onto the blade with one hand while wrenching with the other - a sure-fire way to get a nasty cut.
To do it properly, you need to wedge in a piece of scrap wood between the blade and the body of the table saw. The blade digs into the wood, and not your hand as you loosen the nut.
Switching saw blades is just another part of regular shop maintenance, that thing you need to do from time to time to ensure that your fingers stay attached and your projects look decent.
Sunday, August 23, 2020
"Instant Pot" Autopsy
With everyone staying home more due to the situation that has been happening in the world this year, there seems to be a bit of an explosion of people letting their inner chef out and trying their hand at making home-cooked meals.
This really became apparent when I noticed a definite shortage in the grocery stores on things like flour and yeast. There certainly seems like there is a lot of bread being baked recently.
Another thing that I have noticed, actually long before the pandemic hit, that that there has been a renewed interest in making meals with pressure cookers.
Unlike the pressure cookers of my Grandmother's time, which resembled something that would have been more at home in a science laboratory, the pressure cookers of today look downright sleek and high-tech with custom programs built-in for handling almost anything you would which to make.
Pressure cooking is the process of cooking food at high pressure, employing water, or a water-based cooking liquid. High-pressure limits boiling, and permits cooking temperatures well above 100 °C to be reached, meaning that foods cook much faster with pressure cooking than with other methods
The most common pressure cooker being sold these days is the "Instant Pot" but there are a lot of other cookers on the market that function in exactly the same way.
A few years ago I bought a no-name pressure cooker mainly to do some canning, but recently I also started to use it to make some nice and easy one-pot meals.
Recently I was cleaning the cooker when the relief valve (which is a safety device that is used to release pressure if the internal pressure of the cooker gets too high) fell out of the lid and fell down the drain in my sink.
This meant that my pressure cooker now had a small hole in the top of its lid - not an ideal situation for maintaining pressure.
As it seems to be the case in our disposable world today, a quick search online for replacement parts made it quite clear that it was more cost-effective to buy a new cooker than repair the old one.
After a quick trip to my local store, I was able to start cooking again, but in the meantime, I still had this old cooker.
Perhaps a little dissection was in order - just to see what secrets it held - and maybe to see if we can find some goodies too for future projects.
Sunday, August 16, 2020
Digitizing 35mm Slides with a Smart Phone
Sunday, August 9, 2020
Building a Cheap Elliptical Trainer
Sunday, August 2, 2020
Wooden Garden Tractor Update - Second Attempt at the Drive Train
Sunday, July 26, 2020
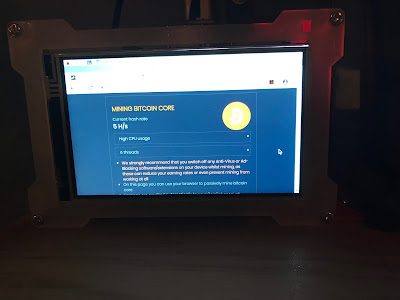
Can You Mine Bitcoin With a Raspberry Pi?
A while ago I did a post on mining cryptocurrency using a Raspberry Pi.
While I was able to mine some CPU based alternative cryptocurrencies like MAGI or Bytecoin, the Raspberry Pi just didn't have enough horsepower to mine major coins like Bitcoin or Litecoin. Those coins needed significant computing power from either a high powered Graphics processor or a dedicated mining machine - something that the Pi didn't have.
While my Raspberry Pi kept chugging away mining MAGI, I kept looking into possible ways to mine something a bit more substantial without busting the budget. I realized that I would definitely not get rich mining on the cheap, but I consider it more of a challenge to see if it could be done.
Sunday, July 19, 2020
CNC3018 Controller Board Repair - Or When Stupidity Strikes
I've been playing away with my CNC3018 router for a little while now with varying degrees of success. I still am learning the ins and outs of the machine but I have been able to make quite a few things with it,
I am definitely nowhere near the level of proficiency that I have seen other people have with the machine but as with any skill, that will come with time.
One thing that I do like about the router is that it's a compact design, making it very easy to move around the workbench whenever I need to make more space. Unfortunately, it was this very portability that got me in trouble.
Sunday, July 12, 2020
Wipe Your Paws! - A Simple Laser Engraved Sign
Sunday, July 5, 2020
Building a Garden Tractor Out of Wood - Trying to Power the Wheels
Sunday, June 28, 2020
Building a Garden Tractor Out of Wood - Mounting the Engine
In my last post, I had just acquired an engine for my tractor, thanks to an old lawn mower that I managed to score to free.
Now that I had my engine, it was time to install it in my tractor.
I started the process by setting the engine on top of the tractor's chassis. The idea was to position the engine as close to the front of the tractor as possible.
However, as the plans had indicated that the engine was to be surrounded by a hood, including a front grill and a dashboard, I also needed to make sure that the engine was not too far ahead, which would prevent proper air circulation around the engine.
Sunday, June 21, 2020
Building a Garden Tractor Out of Wood - Sourcing an Engine
Now that my garden tractor is now able to roll around on its own wheels, I really needed to get an engine sourced for it before I can go any further.
In the original 1941 magazine article, the tractor was powered by what was referred to as a "utility motor" with no further specification on what type of motor that it was, or what type of horsepower that it needed to have.
Looking at the diagram in the magazine, it appeared that the motor in question was the fairly typical small engine of that era that you would find in your finer lawn mowers and garden tillers.
With small engines, there are two basic configurations, regardless of how many cylinders or how much horsepower it may have. A small engine could be configured to have a horizontal drive shaft (ie, the engine provides power to drive things from the side of the engine) or a vertical drive shaft (power is being provided from the bottom of the engine).
Sunday, June 14, 2020
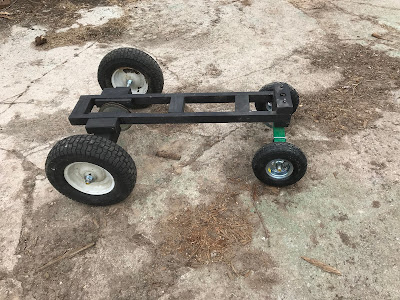
Building a Garden Tractor Out of Wood Update - Getting Things Rolling
Sunday, June 7, 2020
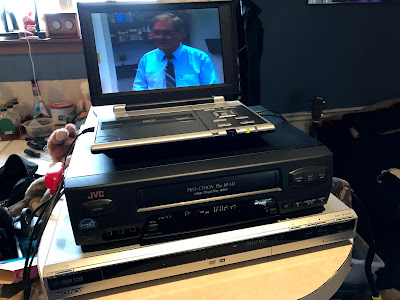
Making Custom A/V Patch Cords - A Quick Project
Last weekend I was doing a bit of deep cleaning in the shed when I stumbled across a box of old VHS tapes.
Its been at least a good 20 years since I last played a VHS tape, so I was a bit mystified as to why I would be holding onto a box full of these things. Since the intent was cleaning out the shed, these tapes now had a long-overdue date with the recycling bin.
But before I sent them on their way, I felt that it might not be a bad idea to at least take a quick look at the contents of the tapes. If there were some treasured memory stored on them, I should probably rescue them before they were permanently lost.
Sunday, May 31, 2020
How Did I Get Here? - Playing with Wires
Sunday, May 24, 2020
How Did I Get Here? - A Woodworking Journey
Sunday, May 17, 2020
Building a Garden Tractor Out of Wood - Building the Chassis
In my last post, I discussed that there seemed to be a lot of neat projects published in the "How-To" magazines that were put out over 50 years ago.
While I marveled at the sheer number of cool projects that there was, I was immediately drawn to one particular project that was published in an issue of Mechanix Illustrated from the late 1940s.
That particular project was for a small garden tractor. While that in of itself wasn't too unique, what made this particular project leap out at me was that it was constructed completely out of wood (well, except for the engine and some small mechanical parts).
Sunday, May 10, 2020
An Idle Mind is a Dangerous Thing
I usually strive to stay busy, whether it being at the day job, or puttering away in the shop during the evenings and weekends or doing the other obligations that I have on the plate.
However, when I do have an odd moment when I have absolutely nothing on the go I often find that my mind tends to wander on what sorts of things I could try out. Often these flights of fancy turn into projects that I have posted here,
Sometimes the pondering sends me down a rabbit hole - with some help from my good friend Google.
Sunday, May 3, 2020
Kitchen Hand Mixer Autopsy
After finishing mixing the cookie dough the old fashion way and doing some quality control testing of the resulting cookies, I decided it was time to take a look at the mixer and find out what really killed it.
Sunday, April 26, 2020
Turning a Simple Clock on a Lathe
Now I was always intrigued by clocks, even from a young age.
A few years ago, I came across an old report card that was issued during my tenure in kindergarten. In the report, the teacher made a comment that one day I had somehow gotten my hands on a box of "broken" alarm clocks - which were being used to teach us how to tell time - and somehow I had managed to get those clocks to work again. Which was pretty amazing except for the fact that I had somehow managed to make the alarms go off during nap time!
Needless to say, I always found timepieces interesting, as evidenced by previous projects that I've posted.
A few months ago I posted a little tutorial on how to turn wooden bowl blanks on a lathe.
Well, I got sidetracked a little bit with some other projects, but the lathe was starting to look a little lonely so I figured that I should give it a little love and try making something with it again.
The project that I settled on was basically an extension of the bowl blank, but with some extra touches including rounding the edges of the blank and cutting a groove into the face.
The spark of this project was due to some more experimentation that I was doing with the Cricut Maker where I wanted to see how the Maker handled fine detail work on wood veneer.
So, being a creature of habit, I decided to build a clock using the Maker and my lathe.
Sunday, April 19, 2020
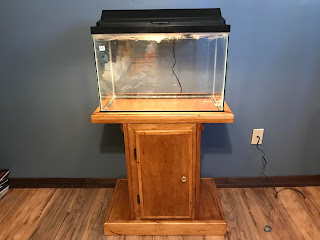
Building an Aquarium Stand - Step 6: Putting It All Together
After all planning and construction, it's finally time to put everything together and get things ready for George to move into his new home.
Since I took a modular approach to the build, assembly is pretty straight forward.
Sunday, April 12, 2020
Building an Aquarium Stand - Step 5: Adding a Door
Sunday, April 5, 2020
Building an Aquarium Stand - Step 4: Building the Base
With the body of the aquarium stand out of the way, the last major component to build the base of the stand.
Since the base of the aquarium stand is going to have to carry the full weight of the aquarium along with the stand itself, I needed to engineer in a lot of extra strength into the base, however, I needed to make sure that it reflected the character of the rest of the stand.
To build in that strength, I decided to have the stand predominately built out of a much heavier material - 2X4 lumber.
Sunday, March 29, 2020
This Isn't Our First Rodeo Folks.
Needless to say, we are living in interesting times.
The world seems to be in a great deal of turmoil these days trying to deal with the virus is anywhere and everywhere. There is a lot of fear out there and it seems like the world has shut down and people are hunkering down.
On the whole, I do need to take a moment and at least appreciate what I do have. I am thankful that I have a job that allows me to be virtually anywhere - especially in my home - and still be able to work and interact with my colleagues (albeit via a webcam).
At the time I write this, I am and my immediate family are still healthy. While we are not under a quarantine order, we have greatly curtailed our activities dealing with the outside world and staying at home as much as possible. Thankfully this also means that I'm not locked away from the shop - which has proven to be a Godsend for me since it allows me an escape from the constant bad news out there.
Yes, in light of everything that is going on, there is much to be thankful for.
Sunday, March 22, 2020
Building an Aquarium Stand - Step 3: Building the Body
In my last post, I had just completed building the top of the aquarium stand.
One of the key items that I needed to figure out for the stand was the overall dimensions of the aquarium that I would be using, the reason for that is that it dictated the overall dimensions for the top of the aquarium stand, which in turn determined the size of the body and base of the stand.
So with the top sorted out, I started working my way down, making next item on the agenda building the body of the aquarium stand,
The design of the stand was that the body of it was going to be basically a large box with some internal storage in order to allow for stashing fish food and other supplies. The box will also need to be built heavily enough to support the weight of the aquarium when it's full of water (which could weigh over 100 pounds).
Sunday, March 15, 2020
Building an Aquarium Stand - Step 2: Building the Top
In my last post, I sketched out a bit of a design for an aquarium stand that I wanted to hold a tank to house George, our tame Sunfish.
With my plan of attack determined, it was finally time to head into the shop and start building.
As I previously mentioned, I designed the aquarium stand to be constructed in three distinct parts (top, body, and bottom).
Since the stand will be custom-built for the aquarium, the first logical step would be to start from the top.
The first step in the process was to find out the footprint of the tank.
Sunday, March 8, 2020
Building an Aquarium Stand - Step 1: Determining a Design
For several years, I've always enjoyed doing a little fishing during the warmer months.
I find fishing to be almost a zen-like experience.
Sitting quietly in a boat, watching the water ripple around me, focussing my senses on a thin monofilament line, trying to sense a bite. I often find the experience quite relaxing and even if I don't catch anything, I always come home rejuvenated.
While what I may call relaxing, others in my house would call it boring, so my fishing experiences have more or less been done solo. So it was much to my surprise that my son wanted to try his hand at a fishing derby that I usually take part in during the fall.
I was even more surprised when he actually enjoyed it enough that he wanted to do a couple more fishing excursions before the snow started to fall.
Typically we fish for Smallmouth Bass or Perch, so when during our last trip of the season my son caught a rather small Sunfish, I was fully expecting him to let the little guy go and keep fishing for bigger quarry.
Instead, he slipped the fish into the minnow bucket and we ended up taking him home with us.

