Recently I wanted to try my hand at turning some bowls on my lathe using some hardwood scrap pieces that I had leftover from other projects. I wanted to create the bowls that had an alternating layer of different wood types in order to give the bowl an interesting appearance.
With my first couple of bowls, I created the bowl blank by layering the wood pieces on top of each other and clamping everything together as tightly as possible with standard wood clamps.
On the whole, everything glued together so I had a relatively solid piece of wood to work with,
However, I did find that I sometimes got fine little gaps between the glued layers. The downside of this was that when I turned the bowl, I would sometimes see daylight shining through those gaps in the bowl's side.
While it is something that the typical person would likely not notice, and I could "cheat" by using wax to finish the bowl (the wax would fill in the gap), I really wanted to be proud of my projects, and seeing a flaw, no matter how minor, always seems to bug me.
I think the issue with the gaps is that no matter how hard I clamp the wood, I do not seem to be able to apply consistent pressure along the entire surface of the piece that I was gluing together.
The other day I was browsing my local hardware store when I came across a display of small hydraulic bottle jacks that was on sale.
Looking at the jacks, I noticed that they were rated for lifting 2 tons. While this is perhaps a bit on the small side for jacking up my truck, it would certainly be more than plenty of force for other applications - like clamping 2 glued pieces of wood together.
I grabbed one of the jacks and headed home to do some tinkering.
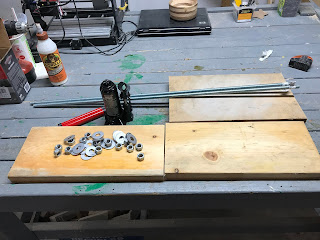
Once I got home, along with the jack, I gather up the following items:
- Two 3 foot long 1/2 inch diameter threaded rods
- Sixteen 1/2 inch nuts
- Sixteen 1/2 inch washers
- Two 1 foot long pieces of 2X6 boards
- One 1 foot piece of 2X10 board
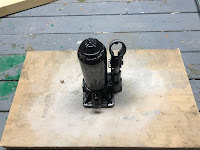
First I place the jack in the center of the 2X10 board and traced the outline of the jack's base onto the board with a pencil.
The reason why I traced the base of the jack on the board was that I wanted to create a mounting point for the jack in order to prevent it from sliding around the board at an inopportune moment.
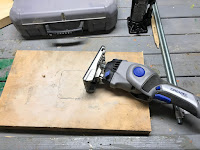
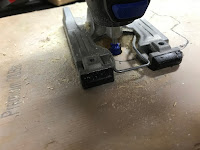
Using my Dremel Trio (any small rotary tool will work too) I cut a 1/4 inch deep opening in the board following the outline that I had traced and removing the excess wood inside the outline.
Next, I took one of the 2X6 boards and set four of the 1/2 inch washers about a half-inch in from each corner of the board.
I then traced the 1/2 inch inside diameter of the washers onto the board.
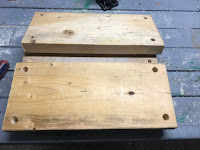
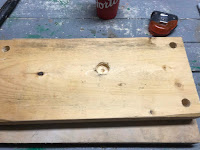
I then drilled a 1/2 inch hole at each spot that I marked on the board.
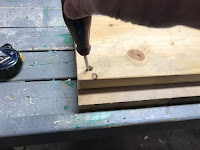
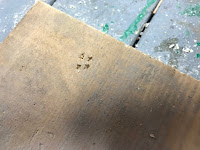
Once the holes where drilled I took the 2X6 board and centered it on top of the 2X10 board. I then used an awl and marked the locations of the holes that I drilled in the 2X6 board onto the 2X10 board.
I then drilled 1/2 inch holes into the 2X10 board at the locations that I marked.
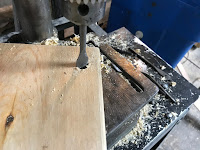
Once I drilled the holes into the 2X10 board I then switched my drill press over to a 1 inch bit.
Flipping the 2X10 over so that the foundation for the jack was on the bottom of the board. I then drilled 1 inch deep holes in the locations that I had just drilled the 1/2 inch holes.
These 3/4 inch holes will act to hide the nuts and washers that I will be installing later so that the 2X10 board will sit flat on the workbench while the clamp is in use.
Next, I took the remaining 2X6 board and marked the hole locations on it in the same manner that I did for the 2X10 board.
Once I marked the spots on the board, I changed my drill press over to a 3/4 inch drill bit and drill 3/4 inch drills in the locations that I had marked.
This board will move up and down the steel rods.
Next, I gave all the parts of the clamp a quick test fit by inserting the threaded rods through the holes in the 2X10 board and placed the jack into the mount that I had cut out for it on the board.
I then placed the 2X6 board with the 3/4 inch holes through the rods followed by the 2X6 board with the 1/2 inch holes.
The 2X6 with the 3/4 inch holes should be sitting on top of the lift point of the jack.
I then gave things a quick test by raising and lowering the jack to make sure that the middle board was able to rise and fall relatively smoothly along the rods.
Once I was confident that the middle board was able to move relatively smoothly, I then marked the underside of the middle board around the area that was in contact with the lifting point for the jack.
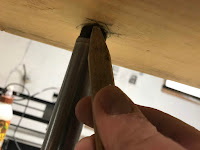
I took everything apart and I drilled a 3/4 inch wide, 1-inch deep hole at the spot I had marked in the middle board in order to act as a mounting for the jack's lifting point to provide some additional stability when pressure is being applied.
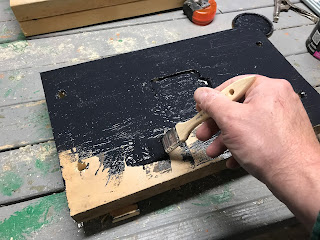
Since I always like to have things looking as nice as possible, I took a few minutes to give the boards a nice coat of paint.
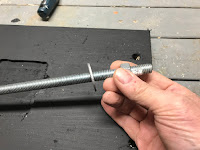
I then threaded a nut and washer about 2.5 inches from one end of the rods and inserted the rods into the 2X10 board with the nut and washer sitting on top of the board.
Turning the board over, I then threaded attached another washer and nut to the rods on the bottom of the board, making sure that the rod and nut are recessed inside the board.
As a final step, I tightened the nuts to the board with a wrench
Next, I reassembled the jack and the middle board.
I then threaded on nuts and washers on the other end of the rods, again putting them about 2.5 inches down from the end of the rods.
I then reinstalled the remaining 2X6 board onto the rods and secured it in place with the last 4 nuts and washers.
At this point the clamp was complete.
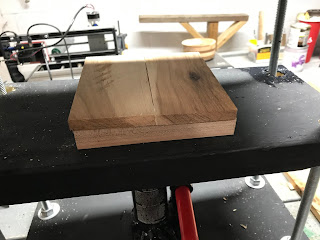
To use the clamp, I place the piece that I want to clamp between the two 2X6 boards. Clamping is accomplished by pumping the jack handle until the jack tightly squeezes my workpiece tightly against the 2X6 boards.
So far it has been working remarkably well, the jack provides very even pressure across the entire area of the workpiece. With the 2 tons of pressure that are being applied, I have found that my gap issue has effectively disappeared.














No comments:
Post a Comment