As I may have mentioned in previous posts, things have been going under a bit of a transformation in the shop.
This summer marked a move to some better (albeit still "small") shop space. As part of this move, I decided to treat myself to an upgrade to my old table saw.
In my past couple of posts, I've discovered and have been experimenting a little with that outcast of the shipping world, the lowly pallet.
Since I was impressed on how well my new workbench had turned out. I wanted to continue my experience of using pallets to further improve conditions in the new shop space.
My new table saw is classed as a compact table saw which is meant for use at construction sites. While a very capable saw, in order for it to be used properly, it really needs to be set securely on a stand or a tabletop.
When I looked at what a store-bought stand would cost, I realized that I was looking at least a couple of hundred dollars for a custom stand for the saw.
Since I had a few leftover pallets from my workbench project sitting in the corner of the shop, something told me that I could probably build something similar for a lot less money.
The design philosophy of this saw stand was to make the stand a custom fit for the saw as opposed to building a generic stand.
The rationale was one of safety.
By building the stand to perfectly fit the saw, there is less likelihood of the saw moving around when in use. Additionally, the saw itself would also provide some added rigidity to the stand since the bottom of the saw will be embedded into the top frame of the saw stand.
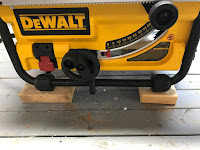
To start the build, I first took my table saw and set the feet of the saw on top of 4 scrap pieces of 2"X4".
First I took three lengths of 2X4 that was slightly longer than the dimensions of the saw's base and placed them around the outside front and side perimeters of the saw.
When I placed the board on the front of the saw, it was placed such that the end of the board overlapped the ends of the sideboards, with one end of the front overlapping ends flush to the end of one of the sideboards.
On the other sideboard, I made a mark on the front board to indicate the outside edge of the sideboard.
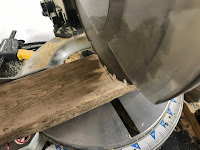
I then took the front board and made a cut at the mark I just made with my miter saw.
I then measured the length of the front board and cut another 2X4 to the same size in order to have a board for the back of the saw stand.
With the front and back pieces cut out, I then test fitted them to the back and front of the table saw and then I measured the distance between the front and back in order to determine how long I needed to make the sides.
Once I had that measurement I then cut out two pieces of 2X4 to that length.
I now had the parts to make the basic frame of the saw stand.
To assemble the frame I attached the boards together with 2-inch deck screws.
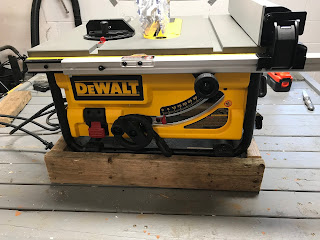
With the basic frame assembled I set the table saw inside it to make sure everything fit.
At this point, the frame will only be able to prevent the saw from sliding off the stand, unfortunately, since we don't have a bottom for our saw to sit on, it's just going to fall through the frame and onto the floor below.
To prevent this, we need to add a bottom to the frame for the saw to sit on.
One issue with table saws is that they produce a lot of sawdust. While modern table saws have a dust port that you can connect to a shop vac to eliminate the majority of the sawdust, a lot of sawdust will still end up on the floor underneath.
The challenge is that we can't simply have a solid bottom on the saw stand since eventually the bottom of the saw will eventually be filled with sawdust, clogging the saw or worse, causing a fire.
To eliminate this issue, I designed the stand to have an open bottom to allow sawdust to fall to the floor. To accomplish this I added 2 bottom rails to the frame that are parallel to the front and back of the frame.
The saw would sit on these rails.
To add the bottom rails I first measured the inside length of the front and back of the frame and cut out two 2X4 boards to that length.
I then attached the boards along the bottom of the front and back of the frame with deck screws.
Once the bottom rails were installed I set the saw into the frame one more time to double-check the fit.
It was at that moment that I discovered a bit of a design flaw.
The saw's blade angle adjustment was handled via a locking lever that protruded down a little past the bottom of the saw's body.
Unfortunately, this lever extended far enough underneath the saw that it was hitting the front frame of the saw stand.
At the back of the saw, while not nearly as bad as the front, I also noticed that the dust port of the saw was also very close to the frame.
To resolve this issue, I marked a 6-inch wide semi-circle on the frame front around the area that the lever would be traveling and I marked a 2-inch wide semi-circle around where the dust port was located on the back frame.
With a jigsaw, I then cut out the semi-circles.
With the base for the table saw now assembled, the next step was to add the legs to the stand.
My plan for the legs was to make them as strong as possible since they will need to be able to take the weight of the saw along with the stresses that it will be enduring from feeding wood from the saw. In order to accommodate that, I again decided to use two 2X4 planks for each of the legs.
To make the legs I first cut out eight 2 foot lengths of 2X4.
After cutting the legs I then attached four of the 2X4's to the corners of the front and back of the saw stand frame with deck screws.
Next, I took the remaining four boards and attached them to the corners of the saw stand sides, positioning them such that the edge of the boards were flush against the legs that I had just attached to the front and back of the stand.
Once everything has been put together, the legs formed an "L" shape at the outside corners of the stand.
In order to further strengthen the stand, I then cut out two 2X4's equal to the length of the side of the stand and attached them to the side legs of the stand approximately one foot from the bottom of the leg.
At this point, the stand was effectively complete
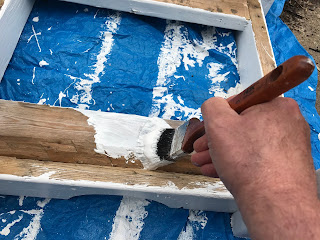
At this point, I could have just called the project complete, but I did want to "class it up" a little bit with a couple of coats of paint.
I've been using the saw stand for a couple of months now and I've been quite pleased on how robust it's been as I've been using the saw to rip a fair number of longboards.
Not bad for what was basically scrap wood.


No comments:
Post a Comment