As you may know, I am a bit of a sucker when it comes to looking for cheap ways of getting wood for my projects.
Previously, I mentioned that I had great success in scoring some very nice wood pieces from scouring the "firewood" bins of a few local furniture craftsmen in my area, however, the wood that I tended to get was a little on the small size - great for small projects, but not so much if I wanted to build something that had a bit of size to it.
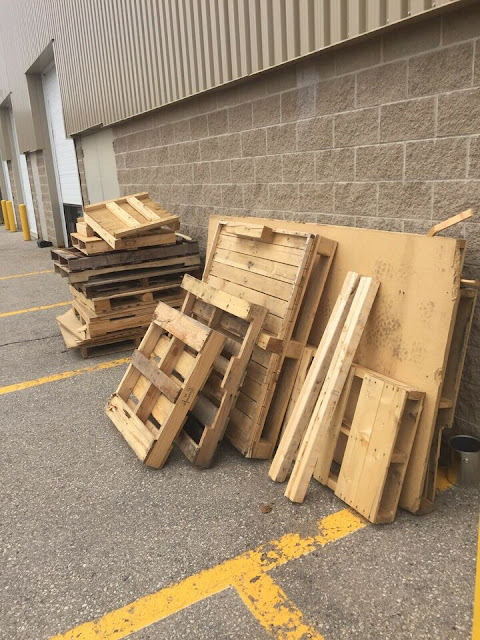
A couple of weeks ago I was running some errands when I came across a large sign that had a magic word on it - Free!
The free item in question were pallets.
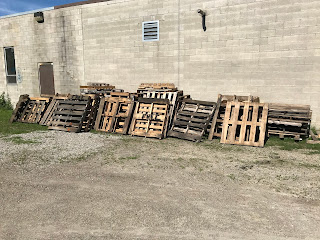
Intrigued, I pulled over and saw a mother-lode of pallets.
I had never really given much thought about using pallets as a source of project materials in the past.
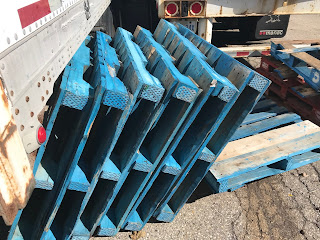
I always assumed that pallets were either made from junk wood - i.e. useless, or that they belonged to someone (which can be true if, as I found out if the pallets are painted. Pallets that are painted blue, for example, mean that they are owned by the CHEP pallet pool)
I had recently noticed however that there was a lot of material online around using pallets for wood projects.
Further research also told me that the wood used in pallets, while looking a bit worse for wear, can be made from a large number of types of wood, including many desirable hardwoods.
As luck should have it, I had purchased a planer for the shop, so finding out what would lie beneath a pallet's exterior was especially appealing to me.
So, I loaded up a few choice pallets from the pile into the back of my truck and headed home.
The first thing I did once I got my bounty home was to do a bit of research on what it was that I had.
The issue with wood pallets is that, while the majority are made more or less "local", there is always a possibility that a pallet could originally have come from anywhere in the world.
Every country has its own standards on how a pallet is made, and in some places, it is acceptable to treat pallets with some real nasty stuff
Most pallets are stamped with an industry stamp that indicates the country of origin of the pallet and what sort of treatment the pallet went through.
In order to avoid exposure to anything nasty I need to ensure that the pallet had a treatment stamp of :
- HT (for heat-treated) and/or
- KD (for kiln dried) and/or
- DB (for Debarked).
Any pallet that carries only those markings are considered safe for use since they would likely not have been chemically treated.
Another thing to look out for on a pallet are signs that liquids had been spilled on them - since we have no way to really know what was spilled, it's usually safe to just avoid using that pallet.
Once I was determined that the pallets meant me no harm, I set about the task of dissembling them.
For the first few pallets, I started to disassemble them using the tools that I had at hand - a crowbar and a claw hammer.
Once I started into the first pallet I immediately noticed a few issues:
- The cross-boards of the pallet tended to split very easily when I tried to pry them up with the crowbar - making the boards unusable.
- Using the hammer to knock the cross-boards off of the pallet's stringers had the same effect as the crowbar - a lot of splintered wood
- My arm was starting to get really sore from all the hammering.
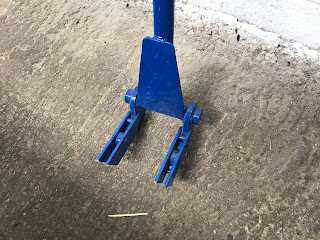
During a search on Amazon, I came across a specialty tool called a pallet buster.
In essence, a pallet buster is just a special crowbar with a long handle to provide leverage with 2 prongs on the business end that are used to straddle the pallet's stringers and applies even lifting pressure to both side of the pallet cross-board (which in theory reduces the risk of splintering the wood).
A quick purchase on Amazon and a few days later I had my pallet buster.
The first thing that struck me was that at 18 pounds, it was a pretty heavily built contraption.
Now that I had the proper tool for the job, I started disassembling my first pallet.
The first (and toughest) step in the disassembly process was removing one of the end boards.
To work properly, the pallet buster needs to be able to straddle a pallet stringer. The issue that I found is that with some pallets, the spacing between the cross-boards can be fairly small, and I needed to carefully shoehorn the prongs of the pallet buster between the gaps in order to keep from potentially damaging the boards.
To remove the first board, I started by prying the board off of one of the outside stringers until the board was free. I then moved down to the center stringer of the pallet and pried the board off of that stringer.
Finally, I moved to the last outside stringer of the pallet and pried the cross-board until it was completely free of the pallet.
From this point on disassembling the pallet becomes much easier.
With the additional space on the stringers now being made available with the removal of the first cross board, removing the remaining cross-boards is done by first prying off the boards from the outside stringers of the pallet, prying the board from the center stringer as the last step.
When it came to the last cross-board, I did have to take it a little more carefully since the stringers were effectively flapping in the breeze since they were only attached to this last board.
This made removing the cross-board a bit tough to do.
In order to give the stringers some support during this final step in the removal process, I had to stand on the stringers to keep them in place (you need to be careful doing this since the stringers may tip over when you remove the cross-board - not a good thing to have to happen when you are standing on the stringer!)
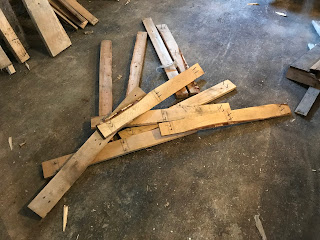
At the end of the process, I had a collection of loose boards where a pallet once was.
While the boards were now taken apart, we were faced with a rather thorny issue.
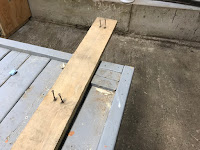
Pallets are usually assembled with nails, which are now sticking out of the cross-boards and stringers that we have just disassembled.
Unfortunately, there really isn't any special tool to make nail removal easy, so I again resorted to the old standbys - a hammer and crowbar.
I use the hammer to knock back nails on the boards so that I can expose the nail heads enough to remove them with the crowbar.
Occasionally, especially if the pallet has been out in the elements a fair bit of time, I do encounter nails where their heads have disintegrated to the point that the crowbar isn't able to get a grip on them. In those situations, I used locking pliers to remove the nail.
As I set about removing the nails, I also had an opportunity to take a closer look at the boards themselves in order to determine what type of wood I had.
Most pallets are made from softwood like pine since they are relatively cheap wood to use.
However, if the pallet was made to carry heavier stuff, pallet manufacturers will resort to a hardwood species as a building material.
As a rule of thumb, hardwood pallets are fairly easy to identify since they will be significantly heavier than a softwood pallet.
The bigger challenge comes in identifying the type of hardwood that you have. The majority of the time, you have to identify the wood by looking at the color and grain pattern of the wood, but sometimes you can get a bit lucky if there is a bit of bark still on the boards which makes identification much easier.
In my case, I had some bark on the boards which indicated that I had acquired a selection of birch
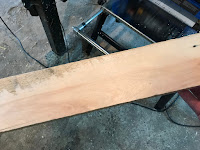
As a final step in the process, I put the boards through my thickness planer. It was a pleasant surprise to watch the wood transform from rough and beat up to beautiful.
With the boards planed, I then marked the type of wood and I stored the boards away in a dry place until I needed them for my next project.
The beautiful thing about wood pallets is that they gave me the luxury of trying out various ideas with the only risk is wasting my time on something that doesn't quite work out (and really, when does spending time in shop ever considered a "waste of time"?) without the extra cost of wasting money on wood.
The wood that you can find in pallets is generally very easy to work with, and personally, it can look quite attractive.
In future posts, I will feature some of the projects that I have been making with my new stash of pallets
Like I said before, a quick Google search turns up many examples of what you can do with pallets.
So if you want to do some recycling while at the same time save some money, pick up some pallets today!











No comments:
Post a Comment