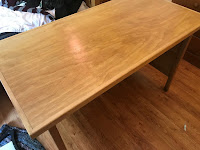
Over the past few weeks I've been building this desk as a series of separate and distinct modules.
The time for the big payoff is here - I can finally assemble those modules together into an actual desk.
The person that I am making of this desk had just asked me when they would be getting it - so I better get cracking and get this done...
I started assembling the desk by joining the top to the desk body.
To make this happen I first attached six 1-inch corner brackets in equally along the top of the desk body and secured them in place with 1/2-inch screws.
While attaching the corner braces, it's critical that the braces be flush against the top edge of the desk body.
To make the corner flush to the edge, I used a block of scrap wood to act as a surrogate for the top of the desk and I held the corner brace against the wood block while I screwed the brace into the desk body.
With the corner braces installed, I was now able to attach the top of the desk.
I placed the top on the desk body and centered it on the body.
Once I was satisfied that everything was square, I secured the top in place by attaching it to the corner braces with 1/2 inch screws.
The next step in the assembly process was to install the drawer cabinet.
The thing I needed to consider with cabinet is that the legs of the desk sticks out by about a 1/4 inch from the side of the desk, and the bottom edge of the desk top hangs down about a 1/2 inch, meaning that I can't simply attach the cabinet to the body of the desk with the top or legs of the desk causing some interference.
To have the drawers work properly, the cabinet needs to be installed about a 1/4 inch from the side of the desk and about a 1/2 from the top of the desk.
To make the cabinet look as seamless as possible, the drawer cabinet would need to be mounted beside the front leg and top front edge of the desk.
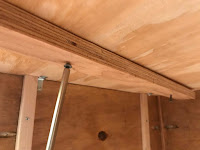
To make this happen, I needed to attach some 1/4-inch thick strapping on the side of the desk along with some some 1/2-inch thick strapping for underneath the top section of the desk.
The strapping was attached in place with 1 inch screws.
The easiest way that I found to install the drawer cabinet was to turn the desk upside down so that the bottom of the desk was facing up.
I then put the drawer cabinet in place on top of the strapping that I had just installed. - again making sure that the cabinet was flush against the leg and bottom edge of the desk
I then installed the drawer cabinet to the desk by attaching it to the strapping with 1.5-inch wood screws.
Once the cabinet was attached, I put the desk back on its feet again and installed the drawers into the drawer cabinet.
And that final act, the desk was done!
Right now the desk is enjoying its new life with its grateful owner. All told the desk was built at a cost of less than $100, which when you consider the price of a similar sized desk at your local discount store, is a pretty good deal.
I can guarantee you to it will last a lot longer than a store bought desk!


No comments:
Post a Comment