The last time I worked on the desk, I had just completed the construction of the cabinet that I will be using to house the drawers.
As I mentioned in my last post, the drawers basically just a bunch of smaller boxes that will be fitting into the bigger box that is the drawer cabinet.
While it may sound simple, there is a fair bit of finagling to be involved in order to make this all work.
When it comes to drawers, there is a great deal of flexibility in the number and size of drawers that you can build. In the case of the recipient for this particular desk, they wanted to have 3 drawers of roughly equal size.
Based on the inside dimensions of the drawer cabinet, I settled on 3 drawers of 9 inches wide, 18 inches long and 5 inches tall.
You may have noticed that I made the width of the drawers 1 inch narrower than the inside width of the drawer cabinet. We need to make the drawers a little narrower in order to accommodate the slide hardware that will be installed later on.
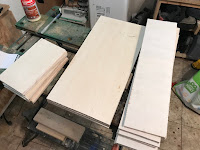
To start the drawers, I first focused on constructing the most visible part of the drawer first - namely the drawer fronts.
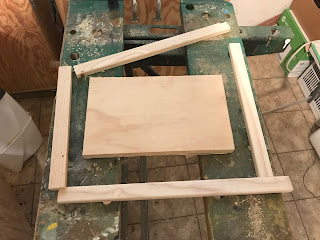
As a bit of a decorative touch, also I wanted to frame the panels with some .75-inch by .5-inch maple strips that I laying around in order to provide a bit of contrast to the plywood panels.
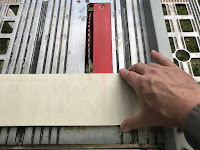
To prepare the strips, I first ran the strips through the router with a round-over bit installed, rounding over 2 edges of the strips on one of the .75 inch sides.
Once the strips were rounded over, I then did a rough cut of the strips so that I had them slightly longer than the sides of the plywood panels.
Next, I used the miter saw to cut the strips to their final lengths by cutting a 45-degree angle on both ends of the trim pieces. When I was cutting the angles, I made sure that the angles were cut so that the "long" end of the angles are on the same side of that strip that had the rounded over edges.
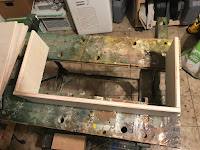
To assemble the strips to the plywood panels, I started by taking 2 of the strips and did a dry fit of the 2 pieces around the plywood panel, joining a corner of the 2 pieces together at one of the 45-degree joint ends. I wanted to make sure that the two 45 degree corners will make a tight 90 angle when they are joined together.
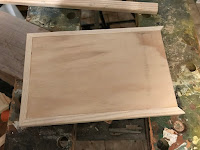
Once I had confirmed the joint fit, I then apply a dab of wood glue on the 45 degree ends and along the back of the strips and attached them to the plywood panel.
I then clamped them in place to make a nice tight joint
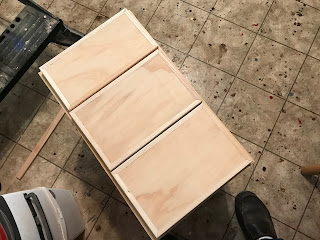
Once the glue had dried, I continued gluing the strips to the plywood panels using the same method until all the drawer panels were framed.
After completing that process, the assembly of the drawer fronts was complete.
The next step in the process was to build the body of the drawers. As I mentioned earlier, the drawer bodies are going to be effectively simple boxes that will fit into the bigger box that is the drawer cabinet.
As I mentioned earlier, I determined that 3 drawers with bodies of 18 inches long, 9-7/8 inches wide and 5 inches tall would be the best option for this particular desk.
To start the drawer builds I first cut out the following parts from 1/2 inch plywood:
- Three 18 inch by 9-7/8 inch panels which will serve as the bottom of the drawers
- Six 18 inch by 5-inch panels which will act as the sides for the drawers
- Six 8.5 inch by 4.5-inch panels which will end up being the front and back of the drawers.
Once I cut out the plywood panels, I returned to my router table (which still had my round-over bit install) and rounded over one side of the side, front and back panels so that I had what looked like a semi-circle along one edge of the panels.
The rounded over edges will end up being the top of the drawer.
Rounding over the edges serves the purpose of not exposing the desk's users to a "hard" edge whenever they need to reach into the drawer for something.
Next came the process of assembling the drawer bodies. In the past, I typically used a rabbet joint to connect the sides together, but this time around I wanted to try and keep to the simple nature of the build as much as possible and I elected to assemble the drawers with glued butt joints.
The rationale is that since the wood glue that I am using is supposed to be very strong and each part of the drawer will be attached to the other parts of the drawer on at least 3 sides, I figured it would be worth the gamble to try this approach - though time will tell...
I started by assembling the front panel of the drawer to one of the drawer sides. I did this by applying a bead of glue along one edge of the front panel, and attached it to the inside edge of the side panel, clamping the 2 pieces in place until the glue dried.
When assembling the 2 pieces together, I made sure that the rounded side of both panels was facing up.
Likewise, I did the same to the back and the other side of the drawer until I had a basic open box shape.
The final step in building the drawer body is to attach the sides of the drawer body to the bottom.
/
To do that I ran a bead of glue along the bottom (non-curved) edge of the drawer sides and attached it to the bottom panel of the drawer.
When attaching the sides, I made sure that they were aligned squarely with the bottom edges of the drawer bottom
I then clamped all the sides to ensure a nice tight joint.
Once the glued had dried, I was ready to install the drawers.
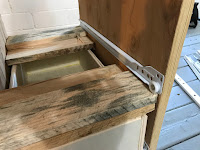
To install the drawers into the cabinet, I used 18-inch metal drawer slides.
To install the slides, I first attached the drawer portion of the slides to each side of the drawer bottoms.
I always seem to find installing drawers to be the most time-consuming part of the desk build and I will be honest, I always dread doing this.
The issue is that the when it comes to installing the drawer rails to the drawer cabinet, the rails need to be installed PERFECTLY otherwise the drawers will bind when sliding in or out because the rails are installed not quite centered to each other, or the drawer front isn't level to the front of the drawer cabinet if the back of the drawer slide is not aligned just right.
Invariably, I need to do a lot of adjusting and readjusting of the drawer slides before things are perfect. I'm sure there is a simpler way to install drawer slides and I have hope that one day I learn the trick to install them.
In the meantime, I started installing the easiest slide first - the one for the bottom drawer.
In this case, installation is very easy since the slide rests along the bottom of the drawer cabinet and is attached to the side of the cabinet with 1/2 inch screws.
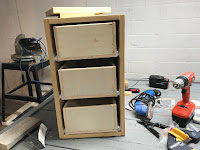
I then installed the first drawer into the cabinet by connecting it into the drawer slides.
With the first drawer installed I then used some scrap wood spacers and test fitted the remaining 2 drawers into the cabinet until I got the overall fit of the drawers in the cabinet that was to my liking.
Using scrap wood spacers as guides, I then installed the other slides to the cabinet.
While this approach got me pretty close to where the slides needed to be installed, I still needed to test fit each drawer to make sure that they slid smoothly in the cabinet and that the front of the drawers were even to the front of the drawer cabinet (so that the drawer fronts would be flush against the cabinet when the drawers are closed), making the needed adjustments to the slides as needed.
With the drawers installed, I then started to install the drawer fronts to the drawer bodies.
The first thing that I did was to locate and drill the holes to attach the pull handles for the drawers.
Next, I temporarily mounted the drawer fronts to the drawer bodies to ensure that the drawer fronts were evenly spaced and centered on the drawer cabinet.
Once I was satisfied with the location of the drawer fronts, I temporarily secured them to the drawer body with a couple screws through the pull hardware holes that I just drilled.
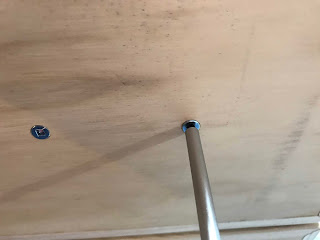
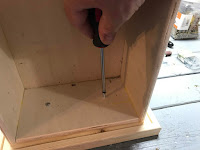
With the position of the drawer fronts determined, I then removed the drawers from the cabinet and permanently attached the drawer fronts by screwing in a couple of 1-inch screws in from the back of the drawer body fronts.
I then removed the screws that I had temporarily installed in the drawer pull holes in the drawer fronts.
With the drawers constructed, it was now time to stain and varnish the drawers and the drawer cabinet.
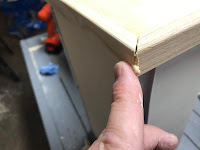
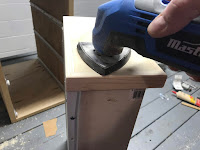
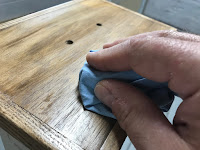
First I filled in any open gaps in the corners of the drawer fronts with some wood fill and gave everything an overall fine sanding.
Next, I gave the drawer fronts and cabinet three coats of varnish, doing a light sanding with steel wool between coats.
The last step in the process was to install the drawer pulls, which are installed by simply attaching the pulls to the drawer fronts with screws.
At this point, I now had the main components of the desk (the top of the desk, desk body, and the drawers) all assembled and ready for the next step.
Finally, the time has come to start putting all together...















No comments:
Post a Comment