A couple of months ago I posted about a recent trip to my local thrift shop. While I did have some fun looking at the weird and wacky things that were on sale there, I also treated the trip as a bit of a scouting mission for potential project ideas.
During that visit, I came across a small desktop weather station that contained a clock, a thermometer, and a hygrometer.
The weather station was a rather cheap looking affair with a price to match (less than $2). Needless to say, it wasn't really much to look at.
However, when I looked past the cheap plastic, I noticed that the thermometer and the hygrometer were in really good condition.
They were just crying out to be put into a better home.
So, I paid my two dollars and took home my next project.
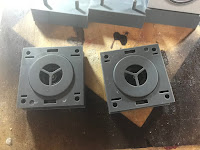
Once I got the weather station back to the shop, the first order of business was to release the instruments from their plastic prison.
I first did a quick inspection of how the weather station was assembled.
Thankfully, the body of the station was basically comprised of a combination of screwed and snapped together plastic pieces.
Freeing the weather instruments was merely a matter of removing a few screws and carefully popping the plastic shell apart.
I wanted to build the cabinet with on some scrap wood that I had lying around the shop. One of the wood pieces that I had was a milled piece of wood that I got from a furniture maker's "burn" pile.
This piece was milled into an oval shape that was about 8 inches long - I figured that this would be an excellent and visually appealing mounting point for the weather instruments (though I could have used just a straight square block of wood for this part too).
I first started by cutting holes into the milled wood piece in order to have the weather instruments recessed into the wood. To cut the holes, I first measured the diameter of the instruments in order to determine the size of the hole I needed to cut. In this particular case, the instruments had a diameter of about 2.5 inches.
The easiest approach to cutting the holes was to use a 2.5-inch hole cutting bit which I cut holes into the milled piece with my drill press,
I cut the first hole in about one inch from one side of the milled piece and I then cut the second hole down one inch from the first hole that I cut.
I cut the holes about a half inch deep and I made sure that the holes were in a straight line in relative to each other on the milled wooden piece.
Once the holes were cut I then hollowed out the holes with a rotary tool in order to create a recessed depression for the instruments to sit in.
Once the recesses were cut, I then measured out one inch from the second hole on the milled wood piece and made a cut at that mark with my miter saw,
At this point, I had a piece of wood with two recessed holes that are located one inch in on each side.
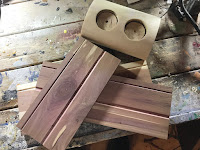
Again I dug around in my scrap wood pile and found some leftover pieces of 1/2 inch cedar that I felt would make a very attractive cabinet for the weather station.
Before I cut the cedar boards down to the size I first wanted to put in a couple of grooves into the cedar boards.
The first groove, made with a 3/8 inch cove bit on my router, was made in the middle of one side of the cedar boards. These grooves will be used as a mounting point for the milled wood piece that would be holding the instruments.
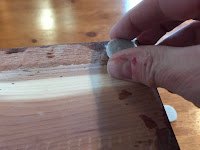
I then switched over to a small "V" groove bit on the router and I then cut a small groove on the same side of the boards, but about 1 inch in from the front end of the boards to provide a bit of a decorative effect.
With the grooves in place, the next step is to cut the cabinet sides to size.
Using the milled piece of wood as a template, I measured out and cut the cedar boards to size with the miter saw. When cutting the pieces out, I made sure to cut the ends at a 45 degrees angle in order to ensure that I would be able to have nice "clean" edges when I went to assemble the cabinet.
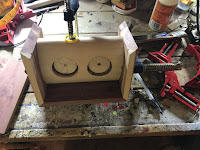
Once I had the parts cut out, I started to assemble the cabinet by first gluing the 2 sides of the cabinet to the bottom part of the cabinet with some wood glue and a couple of corner clamps.
While I was at it I also dry fit the milled wood piece in place in order to make sure that cabinet sides stayed square as the glue dried.
Once the glue had dried, I removed the clamps and placed a bead of glue along the middle groove on the bottom of the cabinet.
I then installed the milled wood into the cabinet so that the bottom edge of the milled piece was seated into the groove and held everything in place with a clamp until the glue dried.
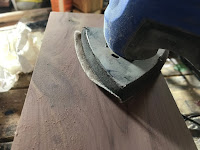
Once the glue had dried, I gave everything a quick sanding and gave the milled wood piece a couple of coats of varnish.
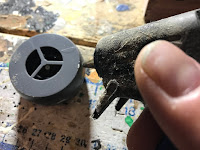
Next, I applied a bit of hot glue to the back of the weather instruments and installed them to the recesses that were cut into the milled wood piece.
Once the instruments were in place I then attached the top of the cabinet with some glue, gave the cabinet sides a final sanding and applied a couple of coats of varnish to the cabinet
As a final step, I attached a couple of felt pads to the bottom of the weather station and with that, the weather station rehab was complete
At this moment, the weather station is enjoying its new life as a desk accessory. It definitely looks a lot classier than its former cheap plastic incarnation













No comments:
Post a Comment