A little while ago I gave a wall outlet in my house a bit of an upgrade by replacing it with an outlet that also doubled as a USB charging device.
I was actually pretty intrigued about the idea of adding additional little enhancements like that to my home. One thing that has always been a bit of a sore point in my household is that sometimes we go out for an evening, usually when it's still daylight out, only to come home to a dark house because we forgot to turn an outside light before we left.
I live in a rural area, so it gets pretty dark out and it can be quite the struggle to unlock the front door in the dark.
I had heard of new light switches on the market that could be connected to your smartphone via your home Wi-Fi and internet connection. Drawing on my fresh experience with the wall outlet, I thought I would take a quick look at them during my next foray to the hardware store.
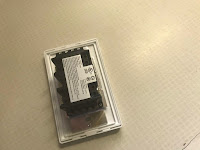
Now my initial thought that the label "Smart" was just a code word for "expensive", but to my surprise, I found a pair of smart dimmer switches for about 20 dollars.
So, they came home with me.
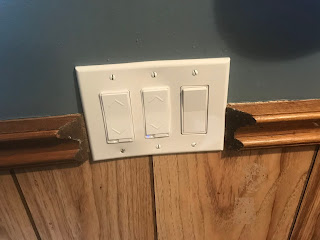
The switches that came in the package came complete with wall plates, which are easily removable if you need to install the switches in a ganged outlet arrangement, which is actually the situation I was dealing with in my case.
Once you've identified which terminal goes to which wire, it basically becomes a process of hooking the correct wire into the correct terminal and tightening the terminals down with a screwdriver.
With everything all wired up, the next step is to push the switches back into the electrical box in the wall and secure them to the wall with the supplied screws. Attach the wall plate to the wall and the installation is done.
Turn the breaker back on for the circuit to the switches - at this point, the switches should act like normal dimmer switches - you just press them on or off to control the lights
All switches will have an app that you need to download from the App Store for your phone. In most cases, the app can be accessed and downloaded by using a handy QR code that will either be on the package or the instructions for the switch.
Once you have the app installed on your phone, the set-up for the switch is done completely your smartphone - there won't be any need to configure anything on the switch itself.
In a nutshell, the setup process typically follows these steps:
- Set up an account on the app
- Enter the ID and password for your Wi-Fi
- The app then goes finds the smart switches on your Wi-Fi network
- Once the switches are found, create a name for the switches to allow you to keep track of them
If everything is configured right, you should be able to do this:
So with a pretty simple upgrade, I've made those trips home to a dark house a thing of the past.
In the similar vein as the USB wall charger, this can be a very simple task for the novice electrician.
Let there be light!


No comments:
Post a Comment