The last time we visited the Junkyard Entertainment Unit, we focused on building a wooden cabinet for the DVD player for the the unit.
Now that we have our cabinet built, the next step is to do something for the LCD screen for the entertainment unit.
My plan is to have the entertainment unit as an "all in one" affair. More specifically, I want to have the LCD screen and DVD player to be joined together as one piece. My design vision for the screen is to give it a look of a framed picture that would "sit" on top of the DVD player. If you recall my Digital Picture Frame post from a while back, that is roughly the look I am going for.
But before I can build the decorative picture frame, I need to first build a cabinet that would allow me to house the screen and attach it to the DVD player.
I started by building a frame to hold the LCD screen. To build the frame, I used four 1/2 inch X 1/2 inch birch strips cut roughly to the size of the LCD screen. These strips will be used as side frames for the screen.
I then roughly assembled the strips around the frame and measured out the overall dimensions of the screen and strips combined in order to come up with a measurement for a back mount for the frame.
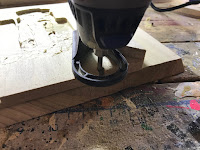
With that measurement I then cut out a piece of 1/2 inch birch to that size to serve as a back mount. In my particular case, my board already had a 1/4 inch groove cut into it which made it perfect later on for routing the wiring harness for the screen (if I didn't have that groove, I would have needed to cut one out with my router).
With the back mount cut out I then proceeded to cut the side frames to size. For neatness I cut the ends of the side strips at a 45 degree angle so that corners were as neat as possible. During the test fitting of the screen I noticed that some of the electrolytic capacitors on the back of the screen stuck out a little bit, which prevented the screen from lying flat on the back mount. To allow room for them I had to cut out a little bit of wood from the back mount.
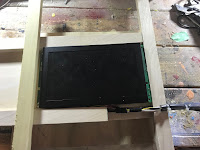
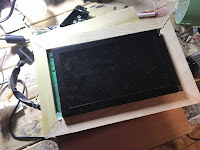
Before gluing the frame strips to the back mount, I added a small pass through hole into the back mount to allow access for the wiring harness. I then placed the screen on top of the back mount and proceeded to install the strips by gluing them to the back mount and placing them snugly around the screen.
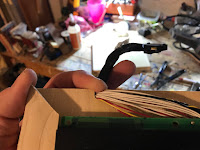
When I attached the strip that was in the location where I had cut the wiring harness access hole, I made sure to route the wiring harness through the hole before installing the strip.
When building the mounting frame, I noticed that the length of the wiring harness was not enough for it to reach the connector on the DVD player.
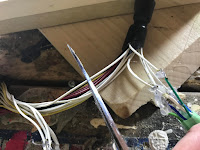
In essence, I needed to lengthen the wiring harness by about a foot. This meant I had to cut each of the wires on the harness and splice a length of wire to each wire. There were about 20 wires that made up the harness, so this was a bit of a monotonous process and I needed to take great care since I need to make sure I didn't connect the wrong wires together.
To do this I cut each wire individually and solder the splices together one wire at a time.
Once all the wires were lengthened, I applied a little bit of hot glue around the splices to provide some insulation.
The next step in the process was to build a mount in order to attach the screen to the DVD player. For this I decided to make the DVD player cabinet act as a cradle for the screen cabinet, with 2 arms coming down from the screen cabinet and attaching to the sides of the DVD player.
To do this, I cut out two 3.5 inch by 8 inch pieces of 1/2 inch birch. I then test fitted the two pieces by standing them up against the sides of the DVD player and marked the location of the top of the DVD player on the two pieces with a pencil.
My plan is to have the screen positioned at a slight upward angle in order to make the viewing of the screen a little bit easier. I figured that having the screen at a 15 degree angle was probably the best option.
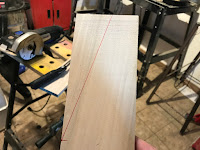
From one of the outer edges of the line that I had marked on the 2 pieces of birch I then drew a 15 degree line to the top of each piece.
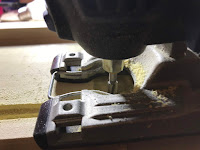
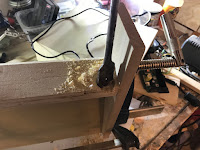
I then made a cut along that line with a saw.
With the DVD player mounts cut out, I then started the assembly of the screen cabinet.
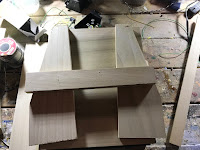
I took another 3.5 inch wide piece of 1/2 inch birch and cut it to the length of the frame that we just built for the screen. This piece of wood will serve as a cross piece in order to attach the two DVD player mounts together. I applied glue to both ends of this piece of birch and attached it to the 2 DVD players mounts such that the cross piece was sitting on top of the DVD player while it was attached to the mounts. I made sure that the sides with the angled cuts were both pointing in the same direction.
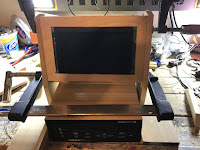
As an added measure of keeping the cabinet square, I also dry fitted the screen frame into the mounting assembly while the glue dried.
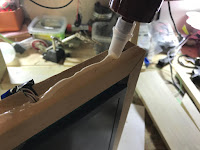
With the mounting frame now put together, I then glued the LCD screen into the mounting frame. When gluing the screen in place, I made sure that the screen was flush with the angled cuts in the frame.
I will be enclosing the back of the frame cabinet, so I need to provide a way for the wiring harness to be able to come out of the frame cabinet so that it can be connected to the DVD player. I made this possible by drilling a 1 inch hole on the right hand side of the cross piece of the cabinet.
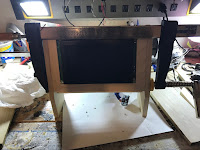
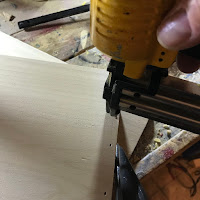
With the wiring harness looked after, we need to enclose the back of the screen cabinet. I took measurements of the back of the frame assembly and cut out a piece of 1/2 inch birch to size. I then glued the outside edges of the frame and nailed the back into place with brad nails.
With that the screen cabinet is built and ready to be attached to the DVD player.
We still need to do a little more work to the cabinet, such as installing a decorative frame and applying a varnish to it, but that will be covered as part of the installation to the DVD player.
















No comments:
Post a Comment