I consider myself quite blessed that I have a job that allows me to work from home quite a bit.
One really nice thing about it is that my morning commute has been reduced from almost an hour to about 2 minutes - the only traffic jam being caused on how long the coffee maker takes to brew up a cup.
The other nice thing is that I can escape the cubicle farm and have my very own "corner office".
The key in making this all happen is that I need to have all the necessary tools to communicate with my colleagues and customers, and that's where the problems begin.
The one thing about home offices, is that sometimes "home" has a way of blending over into "office" - especially when pets are in the home.
At my house, a few cats have decided that it's more their house than mine. While we co-exist very amicably most of the time, they sometimes forget where the money for cat food comes from.
There's been a few occasions where during video meetings, the face that my web cam was showing was quite a bit fuzzier than mine.
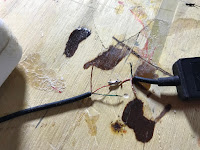
Other than chairing the odd meeting for me, one of the cats has a bit of a bad habit... For you see she has a bit of a habit of treating wires and cords as her personal chew toy. So the other day when I noticed that my headset wasn't very functional anymore, it didn't take long to find out why...
...and who did it.
 |
| Pictured - One Bad Girl |
Oh well. It is what it is.
Now I could have just simply tossed the whole head set and just bought a new one, but that would seem to be a waste since other than a chewed wire the rest of the headset was in perfectly good shape.
Time to break out the soldering iron.
The first step was to cut out the bit of chewed up wire and remove the wire's outer covering.
An initial inspection showed that the cabling for the headset contained 4 wires:
- A copper braided wire
- A green coated braided wire
- A red insulated wire
- A white insulated wire.
The beauty of this type of repair is that we just need to connect the same colored wires together, After doing just that, a quick touch of solder joined everything together
During the soldering process, I encountered something that I seem to find from time to time with some wires. I sometimes find that even though they appear to be regular copper wire, the wires themselves don't seem to take solder very well. This was certainly the case this time, which resulted in some very "blobby" soldering - definitely not my best work.
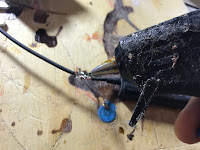
With the soldering done, I then fired up the hot glue gun and gave the bare wires a small coating of hot glue to act as insulation.
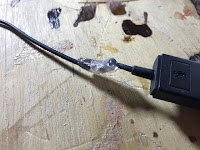
With the wires insulated, I then encapsulated the entire patch in hot glue in order to give the joint some additional strength. After the glue dried I then cover the entire patch with electrical tape ( shrink tubing would have been preferred - but I can only use what I have).
With that, the repair was complete!
I plugged the headset back into my PC and things were back to normal again.
The lesson here is that almost any corded audio item, whether it be stereo headphones, earbuds or computer headsets, can be very quickly and easily repaired.
It certainly beats buying new ones all the time.
As for the cat - she still likes her cords.
I really need to keep an eye on her
 |
| Here we go again |


No comments:
Post a Comment