Sunday, December 29, 2019

Making a Hydraulic Clamp

With 2 tons of pressure, it does a very effective job of clamping

Recently I wanted to try my hand at turning some bowls on my lathe using some hardwood scrap pieces that I had leftover from other projects. I wanted to create the bowls that had an alternating layer of different wood types in order to give the bowl an interesting appearance. 

With my first couple of bowls, I created the bowl blank by layering the wood pieces on top of each other and clamping everything together as tightly as possible with standard wood clamps. 

On the whole, everything glued together so I had a relatively solid piece of wood to work with, 

However, I did find that I sometimes got fine little gaps between the glued layers.  The downside of this was that when I turned the bowl, I would sometimes see daylight shining through those gaps in the bowl's side.   

While it is something that the typical person would likely not notice, and I could "cheat" by using wax to finish the bowl (the wax would fill in the gap), I really wanted  to be proud of my projects, and seeing a flaw, no matter how minor, always seems to bug me. 

I think the issue with the gaps is that no matter how hard I clamp the wood, I do not seem to be able to apply consistent pressure along the entire surface of the piece that I was gluing together. 

Sunday, December 22, 2019

Making a Wood Stove Fire Starter

This fire starter makes starting a fire in your wood stove a snap

Other than getting splinters in my fingers, the other most common by-product of all my work in the shop is compiling a rather large collection of sawdust and planer chips that eventually piles up on the floor around my saws and other tools that I use to nibble away at wood with.

For me, this is a waste product, something to be swept up and dumped into the garbage can to be recycled or composted.

Occasionally, some of my shop waste has been used as mulch material around some of the flower beds around the house here. But for the most part, the woodchips and sawdust were mainly looked at as trash.

For the past few years, I have been volunteering with our local Scouting group. A little while ago the group did a project where they made a campfire starter out of some wood chips, candle wax and a small paper cup that you would normally use for mouthwash. I was actually pretty amazed at how simple it was to make one of those things, and was even more amazed at how well they worked in starting a campfire. 

My parents primarily heat their house and as long as I can remember, they were always commenting that they sometimes had to put in a bit of effort to get the fires burning in the mornings.

Thinking back on what the Scouts did, and looking at another pile of sawdust on the shop floor, an idea struck...

Sunday, December 15, 2019

Making a House Number Sign

The sign is out, and swinging in the breeze

In my last post, I did some playing around with a new CNC router that I had purchased recently. As I mentioned in that post, I had a very simple but practical project as my first creation with the router - an address sign for my house.

In the rural area that I live in, the post office delivers the mail to a mailbox that you would install at the end of your driveway.

While it is usually pretty easy to figure out which mailbox belongs to which house, the post office has a requirement that you post either your name or your house number on your mailbox.

I suppose this makes sense since while I have had the same postal carrier delivering my mail for a few years now and they are pretty familiar with me and where I live, when it happens that I have someone new delivering the mail, I can see where they may have trouble if the boxes were not marked.

Most people simply run down to the local hardware store and buy some stick-on letters for their mailboxes,, on the other hand, I did want to have something a bit more unique for my mailbox.

Sunday, December 8, 2019

The Robot Router - Trying out a 3018 CNC Router

3018-pro CNC router

I'm not sure how I arrived at the notion that I needed this thing.

I suppose it really stemmed from the fact that I needed a new "For Sale" sign for the collection on wooden wonders that I had sitting on my front lawn.

In the past, I had used one of those cheap plastic signs that you can pick up at the hardware store for a few dollars, but the one that I had been using blew away in a wind storm recently.

While the old sign did serve its purpose, I have been wanting to class things up a bit and have my sign be more in keeping with what I was selling.

Now, there are a few ways to make a sign out of wood.

The easiest way is to just slap some paint on a wood board, but let's be honest, my free hand lettering abilities leave much to be desired.

Alternatively, I could also cut in the letters freehand with my Dremel Trio, which is something I had done before and was seriously considering before a chance encounter with an ad that popped up on Facebook one day (I swear Facebook has some sort of app that reads your thoughts).

The ad was for a small CNC router that could be bought for only a couple hundred dollars.  Previously, I had always assumed that CNC routers that were large hulking things that could only be bought for the few thousand dollars, so seeing one for a tiny fraction of that leaped out at me.

Sunday, December 1, 2019

Installing a Key-less Deadbolt Lock

Entry into my home is now a simple matter of entering a code

Recently the deadbolt on my back door gave up the ghost.

One of the pet peeves that I had about my old deadbolt was that that it was the old school type that required a key in order to gain access to the house from the outside.

While that is basically the purpose of a deadbolt, I had found it a bit annoying whenever I found myself in the backyard after mowing the yard, trying to get into the house only to find the back door locked. After a fair bit of pounding on the door and yelling, one of the other occupants of my home would eventually amble down to let me in.

Granted it was a very minor problem, but it did bug me.

So with the demise of the old deadbolt, I figured that this would be a perfect opportunity to find a way to eliminate my pet peeve but still maintain the security of my home.

At my local hardware store, I had noticed that they had deadbolts that could be unlocked by entering a user-defined code on a keypad. The particular deadbolt that I was looking at also was on sale for a decent price.

Excited about trying out this marvel of security, I grabbed a box and headed back home.

Sunday, November 24, 2019

Selling What You Make


The truest test for anyone that makes anything, whether it's woodworking, nick knacks or knitting  is finding out if what you make is good enough that an average person would be willing to have one of your creations for themselves.

Now don't get me wrong, I'm not into making things just to get recognition and praise from others.

To me creating stuff is a form of therapy - the act of having something that started out as an idea in the back of my head turn into something that I could touch and interact with is highly rewarding and helps stoke my need for self actualization.

While I enjoy puttering with wood and electronic bits, I also consider what I am doing as developing a skill, something that I can grow into and improve as time goes on.

Sunday, November 17, 2019

Fooling Around With The NEJE DK8KZ Laser Engraver

NEJE DK8KZ laser engraver

It all stemmed from a desire to make a clock look better.

Over the past month, I've been experimenting with building wall clocks out of some hardwood that I had salvaged from the pallets that I have been collecting.

The idea was to glue the wooden pieces together and turn them down on my lathe so that they had a nice circular shape and a smooth clock face.

While I was pretty happy with how things turned out on the lathe, I was faced with a bit of a dilemma on how to best put the face on the clock.

In the past, I would have gone the easy way and stuck on those plastic numbers that you can find in any craft supply store, but I felt that is would really detract from the look of the hardwood.

I really wanted to engrave the numbers into the clock face, but to be honest, I am not really artistic enough to properly etch the numbers onto the clock's face with my router.
This left me with going with some sort of automated way to etch in the numbers. In the end, I ordered an inexpensive CNC router (which I will talk about in a future post). But while I was doing my research online to figure out what router to get, the internet elves keep showing me this rather small laser engraver as an alternative suggestion.
While I did order a router,  I was gradually becoming more intrigued by this little laser engraver that was being pushed on me.

Eventually, I was taken in by a sale price of less than $70 so I figured, what the heck, and pushed the Order Now button.

Sunday, November 10, 2019

Searching for Gliders with the Open Glider Network

Many gliders in the air

It all started with a rather mysterious message on my answering machine.

When I came home from work a few weeks ago, I noticed the little red light on my answering machine was blinking, indicating that a new message had arrived.

The message was from a gentleman from Ottawa wondering if I was the person that was running a FlightAware receiving station, and if so, would I be interested in helping to track some gliders for an upcoming international soaring competition that would be occurring in my area soon.

Intrigued, I phoned back and after a nice long conversation, I got a quick education on a system that the glider community has been using in Europe for several years and they were very keen on getting firmly established in North America and were wanting to have it in place for the competition,

The underlying goal of this system is safety - in Europe, flying gliders is quite popular which has created situations where several gliders can occupy the same airspace, creating an increased potential of mid-air collisions.

Sunday, November 3, 2019

Table Saw Stand from Pallets

A stand fit for my new table saw

As I may have mentioned in previous posts, things have been going under a bit of a transformation in the shop. 

This summer marked a move to some better (albeit still "small") shop space. As part of this move, I decided to treat myself to an upgrade to my old table saw. 

In my past couple of posts, I've discovered and have been experimenting a little with that outcast of the shipping world, the lowly pallet. 

Since I was impressed on how well my new workbench had turned out. I wanted to continue my experience of using pallets to further improve conditions in the new shop space. 

My new table saw is classed as a compact table saw which is meant for use at construction sites. While a very capable saw, in order for it to be used properly, it really needs to be set securely on a stand or a tabletop. 

When I looked at what a store-bought stand would cost, I realized that I was looking at least a couple of hundred dollars for a custom stand for the saw. 

Since I had a few leftover pallets from my workbench project sitting in the corner of the shop, something told me that I could probably build something similar for a lot less money. 

Sunday, October 27, 2019

Building a Workbench out of Pallets

A nice workbench made from pallets

In my last post, I had talked about the veritable treasure trove that I found when I came across a sign pointing the way to some free wood pallets.

After doing a couple of more hunting and gathering trips for pallets, I finally lucked upon some pallets that were 8 to 10 feet long courtesy of a local fencing business.

Once I got the pallets home and disassembled, I ended up with a good supply of 8 and 10 foot 2X4 boards which were used as the stingers for the pallets.

8 to 10 foot stringers

Earlier this summer, I moved my shop to a slightly larger space (don't worry, it's still a small workshop so I won't be changing the site's name any time soon). Because of this move, I now had the opportunity to finally have a proper workbench and allow me to retire the old Black and Decker Workmate that had served me faithfully for many years.

Since I was fairly keen to try a project with recycled pallets, I figured that a basic workbench would be the perfect first project.

My criteria for the workbench was pretty simple. It needed to be large and strong enough to hold any large pieces that I may be working on. It also needed to be at a height that would allow me to work without too much strain on my back.

I determined that a workbench with 4 feet by 5 feet working area set at a height of 3 feet would be the best fit for me.

From there I drew up some quick plans.

Sunday, October 20, 2019

Long Live the Lowly Pallet

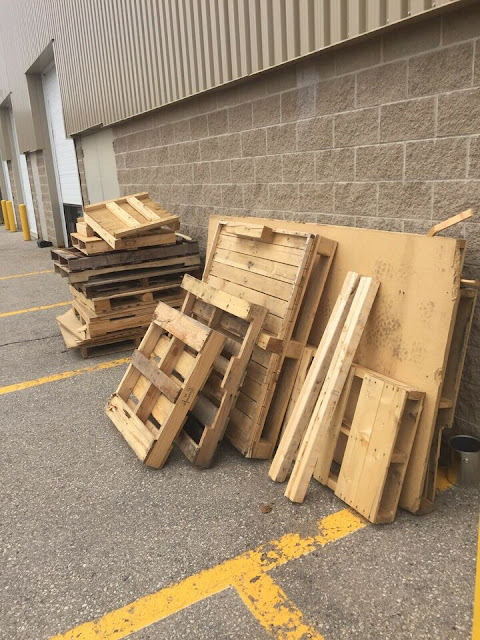
A plethora of pallets!

As you may know, I am a bit of a sucker when it comes to looking for cheap ways of getting wood for my projects. 

Previously, I mentioned that I had great success in scoring some very nice wood pieces from scouring the "firewood" bins of a few local furniture craftsmen in my area, however, the wood that I tended to get was a little on the small size - great for small projects, but not so much if I wanted to build something that had a bit of size to it. 

A couple of weeks ago I was running some errands when I came across a large sign that had a magic word on it -  Free! 

It certainly got my attention

The free item in question were pallets.

Intrigued, I pulled over and saw a mother-lode of pallets.

Sunday, October 13, 2019

The New Toy - DeWalt DW745 Compact Saw

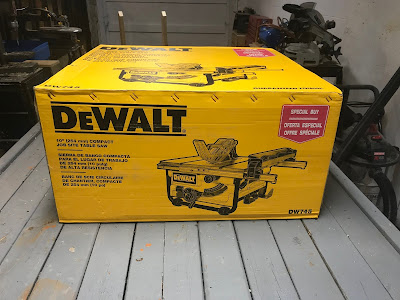
My new toy - ready to be opened

Every once in awhile Christmas arrives in the shop when a large box suddenly shows up with the promise of something exciting within.

For a long time, I had my eye on a DeWalt compact table saw to replace the old Black and Decker table saw that was starting to get a little tired after many years of faithful service.

What really drew me to this particular Dewalt saw was that the rip fence was integrated into a geared rail system that had a measurement indicator that showed the distance between the blade and the rip fence.

Basically what this meant was that I could accurately set my rip fence with just a twist of a knob versus manually sliding the rip fence and measuring the distance between the blade and the fence with a tape measure.

The fence system that this saw used also guaranteed that the rip fence would be parallel to the blade, something that I always had a bit of an issue with table saws that had to be manual slid into place.

Since I don't have a very large budget for tools, I had to rely on asking for Home Depot gift cards as birthday and Christmas presents. After a few years, and a lot of patience (not to mention a lot of gift cards), I finally had enough accumulated to claim my new toy.

Sunday, October 6, 2019

Project - Junkyard Desk Chair


What sparked this project was a sudden need for a new desk chair.

The back of my old desk chair was broken the other day when I leaned back a little too far. Thankfully the only other thing that got injured was my pride.

When I popped out to the store to look at getting a new chair, I was downright shocked by the prices that are being asked for a desk chair these days.

Then it struck me, during the little tours of my local auto salvage yard, I did notice that there were an abundance of very well made seats that if you looked at them the right way, could make very serviceable desk chairs.

At around 20 dollars for a seat, the price was certainly right.

After a quick trip back to the salvage yard, I started work on building my Junkyard Desk Chair.

Sunday, September 29, 2019

Project - Solar Powered Flower


Last winter I noticed that I had accumulated a sizable collection of small 5 volt DC motors which I had salvaged from a bunch of old CD ROM drives.

Trying to think about what I could do with these motors, I played around with them a little bit to come up with some ideas. It was during these experiments that I realized that when one of these motors were hooked up to a solar cell that I had laying around, it seemed to spin the motor at a very good rate. From there, an idea was formed.

Sunday, September 22, 2019

The Seasonal Shop Expansion

When the summer comes - it's time to build stuff outdoors

As you can tell from my desk building project, the main disadvantage of having a small shop is that I am really limited in the amount of space that I have available for working on those really big items,.

Sunday, September 15, 2019

Building a $5 Smart Phone Tripod Mount


In a lot of ways, your typical smartphone has merged a lot of gadgets into one small device.

Today my smartphone has replaced to need to have a calculator, digital camera, notebook, among other things.

In a recent upgrade to my smart phone's operating system, I can even now use my phone as a bubble level and tape measure.

One thing that smartphones have been excelling at recently is capturing of high definition video, which means that my old camcorder can now be put out to pasture along with my old Casio graphing calculator.

Recently I got a new toy (which I will post about in the future) and I wanted to try my hand at making an unboxing video that all the cool kids seem to be doing these days and I figured this would be a perfect thing to record with my smartphone.

The gotcha here was that in order to do an unboxing, I really needed to be able to use my 2 hands - meaning I couldn't really hold my smartphone and unbox my new toy at the same time.

Luckily I still had my old tripod from my camcorder - I just needed some way to mount my smartphone to it.

A quick Google search paraded a plethora of mounts for my tripod - all way, way above the price I would be willing to spend for what really is not much different from a smartphone holder you can get for your car (which I could easily get for less than 2 dollars down at my neighborhood dollar store).

After one such trip to my dollar store, I ended up coming home with one of those cheap car phone holders - and an idea.

Sunday, September 8, 2019

Web Page Visitor Counter Part 3 - Putting it all Together

The website visitor counter finally comes together

Now that I finished building the software "LEGO" that I needed to do in order to have some way of displaying the number of visitors that I had on my website, the time had finally come to stop pounding away on the keyboard and to work on something that was a wee bit more tangible.

Before I started work on creating my Google Sheets and ThingSpeak applications, I first made a couple of quick purchases on eBay for the various electronic bits that I would need to make my visitor counter a reality.

Sunday, September 1, 2019

Web Page Visitor Counter Part 2 - Adding Thingspeak

ThingSpeak main page

In my last post, I stated that I wanted to build an IoT device that would display the number of visitors to this very website.

As I mentioned in my last post, I was finding it a bit difficult to find an easy way to read my visitor count via an API call to the IoT device that I would use to display the visitor count.  After some poking around I figured that I could obtain that data via a combination of Google Sheets reports and a ThingSpeak API application.

In my last post, I focused on the building of the Google Sheets report. This time around I will be focussing on building the ThingSpeak logic to read the Google Sheets report and to create a data pipe that my IoT device can use.

Again, this is going to be more of a post about software than spending quality time in the shop, but trust me, we will be back in the shop soon enough.


Sunday, August 25, 2019

Web Page Visitor Counter Part 1 - Using Google Sheets

Counting the Page views

Buoyed with my recent success with my IoT Weather Station, I figured that I should try and up my game, so to speak, and try something a bit more challenging in the IoT arena.

Since I am always curious about what the traffic is on this very site that you are visiting now, I figured that some sort of device that would monitor the pageviews on the site and display the current view count would be a perfect next project on my IoT journey.

Doing some research, I found that it was fairly easy to display view counts for certain sites like YouTube or Instructables.com since those particular sites offer custom API (Application Programming Interface) services that make obtaining that data a relatively simple matter of one or 2 lines of software code on your IoT device.

While on the surface it did seem that making a device to display the page view counts of the website, I quickly discovered that while it is pretty easy to use API calls for those web sites, there are no API's out there that will work for ANY website. 

So clearly I needed to find a way to have my IoT device talk to my website in order to tell me how many visitors.


Sunday, August 18, 2019

Quick Tip - Making Wood Corners Look Seamless

A nice tight corner - or is it?

When trying to build something that is intended to be "nice" - be it a piece of furniture, or a potential heirloom piece, I try to take as much care as possible when I am building them, making sure that each cut is exact, and every part fits together as tightly as possible.

In spite of my diligence, I do seem to have a bit of a problem when it comes to cutting 45-degree corners.

Sunday, August 11, 2019

Building an Inexpensive Desk Part 5 - Assembling the Desk

Desk is finally built!


Over the past few weeks I've been building this desk as a series  of separate and distinct modules.

The time for the big payoff is here - I can finally assemble those modules together into an actual desk.


The person that I am making  of this desk had just asked me when they would be getting it - so I better get cracking and get this done...

Sunday, August 4, 2019

Building an Inexpensive Desk Part 4 - Building Desk Drawers

Desk Drawers - ready to install

The last time I worked on the desk, I had just completed the construction of the cabinet that I will be using to house the drawers. 

As I mentioned in my last post, the drawers basically just a bunch of smaller boxes that will be fitting into the bigger box that is the drawer cabinet. 

While it may sound simple, there is a fair bit of finagling to be involved in order to make this all work. 

Sunday, July 28, 2019

Building an Inexpensive Desk Part 3 - Making the Drawer Cabinet

Next up - the cabinet for the drawers

In my last couple of posts, I went through the construction of the top and body of my desk. 

If I chose, I could have just joined the 2 pieces together at this point and I would have had a nice, simple functional desk.

However, as with anything that is made to order, the recipient for this particular desk had a need to have someplace to store their "stuff" so that it wouldn't be cluttering up the top of their desk, or even worse, sitting in a box beside the desk. 

More specifically, they wanted the desk to have drawers. 

In of itself, building drawers for the desk is a fairly straight forward concept. It's basically a matter of building a bunch of small boxes that would fit into a bigger box. 

The deceiving part in all this is that getting the small boxes to fit properly can take quite a bit of fiddling, but I am getting ahead of myself. 

For this post, the focus will be on the construction of the "big" box, or the cabinet that will eventually house the drawers. 

Sunday, July 21, 2019

Building an Inexpensive Desk Part 2 - Building the Body

This time around we build the body of the desk

In my last post, I went over the construction for the top of the desk. While we now have a really nice work surface, it's not really much good without something for it to sit on.

So our focus this week will be on creating the body for our desk.

Sunday, July 14, 2019

Building an Inexpensive Desk Part 1 - Making the Top

The first piece of the desk to be built is the top

One of the biggest challenges of having a small workshop is that whenever I have a need to create a project that is a bit sizable, things can get a bit.... cramped.

A few years ago I was browsing the DIY section at my local book store when I came across a book written by Danny Proulx called "Simply-Built Furniture".

What struck me the most about the book was that Danny had showcased how to build some really elegant looking furniture with nothing really more than plywood and common sized pine boards.

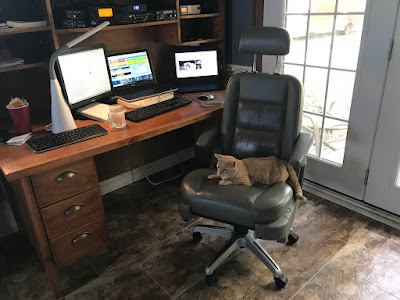
At that time I was really in a need for a desk that was large enough to hold all of my amateur radio and computer equipment. One of Danny's plans included a large executive desk that also included a hutch.

On the surface, it looked like a pretty ambitious project, however, with the simplicity of his method of construction, I was able to create a really nice looking and very functional piece of furniture.

Sunday, July 7, 2019

Project - PiAware Radar Kiosk


Earlier this year, I became aware of a very interesting company called FlightAware which offers flight tracking of both private and commercial aircraft throughout the world. As part of its service,

Flight Aware relies a lot on crowdsourcing of its tracking data from thousands of private radio receiving stations that monitor the Automatic Dependent Surveillance-Broadcast (ADS-B) signals of any aircraft that are flying overhead.

These signals provide the GPS location, altitude, speed and direction of the aircraft, which can be easily received by a radio receiver and sent to FlightAware to provide real-time tracking.

The beauty of this arrangement is that this information can be received and sent by a lowly Raspberry Pi and a very inexpensive SDR (Software Defined Radio) dongle. This type of receiving station is more commonly known as a PiAware station.

Having a spare Wi-Fi enabled Raspberry Pi on hand, I was pretty intrigued by this and after ordering a $20 SDR dongle off of eBay, I was up and monitoring the airplanes in my area.

One of the neat features of the PiAware system is that you are able to see a real-time map of what your PiAware station is receiving via a web interface that you can view on a computer that is part of your WiFi network. As an added bonus, the PiAware web interface also gives a live weather radar picture for my area.

That's where there the inspiration for this project started. I also had a rather elderly Raspberry Pi 1 Model B kicking around. While the old girl was a bit slower than its newer siblings, it still had a lot of life left in it. As part of my investigation on what I could do with an old Pi - I stumbled upon some details on how you can use a Raspberry Pi as a web browser kiosk - similar to those that you see in places like airports to display up to date information.

And with that, the SkyAware Radar Kiosk was born.

Sunday, June 30, 2019

Making a Microscope Light on a Lathe

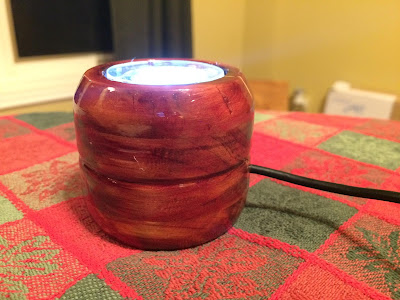
A very simple microscope light made from scrap wood and dollar store parts

While I do not consider myself an "old fart", my oldest child is currently in his third year of a microbiology major at university (let's just say that I'm on the "older" end of Gen X then).

While I personally pursued a career in IT, spending time looking at tiny things with a microscope is a bit of a family tradition since my father spent part of his career looking at rather nasty bugs during his time as a veterinarian.

In the early part of his career, my father had acquired a microscope where as a kid, I remember watching him using it and sometimes taking a peek myself at the microscopic world that it revealed.

That microscope has spent many years stored away in the back of a closet, however when my own son wanted to take up the family trade, so to speak, My father figured it was time to pass the torch (or in this case, microscope) on to the next generation.

Microscope light in use

While the old microscope still had lots of life left in it, it was missing one critical piece  - the light for the microscope had gotten lost in the mists of time. 

Since I never really had much use for the microscope myself, I did want to add my part to the passing of the tradition - and with that, a new microscope light came to be.

Sunday, June 23, 2019

Thrift Shop Weather Station Rehab

A Thrift Store find looks forward to a better future

A couple of months ago I posted about a recent trip to my local thrift shop. While I did have some fun looking at the weird and wacky things that were on sale there, I also treated the trip as a bit of a scouting mission for potential project ideas. 

During that visit, I came across a small desktop weather station that contained a clock, a thermometer, and a hygrometer.  

The weather station was a rather cheap looking affair with a price to match (less than $2). Needless to say, it wasn't really much to look at. 

However, when I looked past the cheap plastic, I noticed that the thermometer and the hygrometer were in really good condition. 

They were just crying out to be put into a better home.

Sunday, June 16, 2019

Building a Stevenson Screen for the IOT Weather Station

Stevenson Screen installed

The last time I talked about the IOT weather station, I had just finished putting together a workable way to power the station with solar power.

Now that I have the electronic solution worked out, the final step was to house everything in a weather resistant enclosure that still allowed the station access to the outside air in order to ensure accurate readings.

Basically what I needed to construct was a Stevenson Screen.

Sunday, June 9, 2019

"Let's Be Careful Out There"

Though nicely healing up, there is a cautionary tale to be told


While this may horribly date me, that was the famous catchphrase of Sgt Phil Esterhaus from Hill Street Blues.

While it was meant to be advice for law enforcement officers that were going on duty, it is also very good advice of those of us that use tools that are powered and very sharp, often at the same time.

I've been using power saws and other such devices since I was a young teenager and I always treated those tools with a great deal of respect.

For many years (decades even) about the only injury that I ever got was the occasional sliver.

But all that good karma with power tools can be for naught if you are only distracted for a second when one of these things are running.

Such was the case for me last fall.

Sunday, June 2, 2019

Project - The Backwards Alarm Clock

You really need to look twice to figure out the time


This project originally evolved from another project that I had made several years ago.

Back then I created a clock that hung on the wall in my office at work.  What made this clock unique was that I was able to make the hands move backward by making a very simple change to the clock movement. At that time, the clock caused a few of my co-workers to do a double take.

Fast forward to today, I was recently in need of a new alarm clock. While it would have been pretty easy to pop down to the store and buy a regular run of the mill clock radio, I figured that this would be a great opportunity to try my hand at building another backward clock - but instead of  having it just hang on a wall, it would serve as my new wake up tool.

All the gory details on how I built this clock can be found here

Sunday, May 26, 2019

Taking The IOT Weather Station Off the Grid

NodeMCU weather station hooked up to a solar charger circuit


A few weeks ago I put together a simple weather station using a NodeMCU based IOT device and a DHT22 temperature module.  I had the device sent its data to a cloud service where I would be able to see what the temperature and humidity were at my house from literally anywhere in the world.

While I was happy in how things turned out in order to power up the station I needed to have it connected to a USB power source.  Since I wanted to have the weather station to be located outside, I needed to find a way to keep it powered up without the need for it to be plugged into a wall socket.,

Since the NodeMCU only requires 5 volts to run, it does make it a perfect candidate to run off a battery. If it can be run off a battery, then that also means that the battery itself can be charged with a solar cell.

Sunday, May 19, 2019

Harvesting Electronic Components

The bounty that awaits within junk electronics

We seem to live in a world today where what was once the latest and greatest in tech gizmos very quickly become obsolete and subsequently are disposed of as useless junk.

Often times, the device in question for the most part still works fine, it perhaps just isn't as fast as the next new thing or it doesn't have the latest cool features.

Thankfully a lot of people will make an effort to ensure that their electronic orphans go to a proper home, be it by being donated to a charitable cause, or routing them to the local e-waste recycling center.

In my line of work, I come across a lot of desktop computers that have gotten too long in the tooth to be used in a typical business setting.

While they no longer pass muster in their old life, after a bit of a tune up and a full scrubbing of the hard disks, I often can find new homes for those old PCs by donating them to a local charity that runs a small computer lab for kids to use.

Occasionally I do come across a computer that is a total basket case in which no amount of polishing will make it shine again.

While I could simply just toss the whole thing into the e-waste bin myself, I have found that these old machines still have parts that can still live on as part of something else.

We just need to bring in the harvest, so to speak.

Sunday, May 12, 2019

Project - Lighted Curio Box


As mementos of an experience of a lifetime in Europe, my daughter collected a series of commemorative coins during her time there. When she returned home I didn't want these reminders of this experience to merely languish in a cardboard box in a closet somewhere.

With this in mind, I wanted to create something special as a Christmas gift to my daughter - something that would showcase and protect the memories that she came home with.

With some extra wood that I had left over from previous projects and some "junk" electronic parts, I was able to build this curio box that would light up and showcase the treasures that it held within.

All the details on how I built this keepsake box can be found here.

Sunday, May 5, 2019

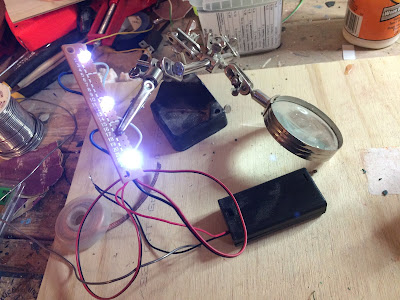
Salvaging LED's

I got a bunch of white LED's for free - though I had to do a bit of work for them


While you can purchase LED's from almost any source, I usually try and get my source of parts from things that are on the way to the local landfill.

In this particular case, I had a string of defunct white Christmas lights that contained approximately 50 white LED's. To salvage the LED"s from the string, I first had to cut the individual "bulbs" off of the light string with a pair of wire cutters.

Sunday, April 28, 2019

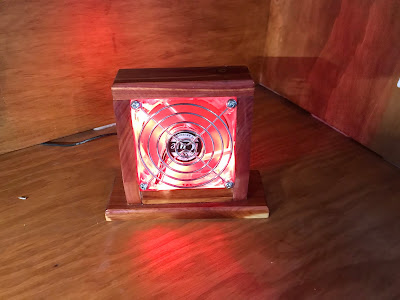
Converting a Computer Fan to a USB Desk Fan

Keeping me cool while giving a cool light show

Among the various bits and pieces that I have floating around in my box of electronic junk, I have accumulated a number of fans from defunct desktop computers.

These fans always very quiet, efficient and they can move a lot of air within a small footprint.

Because of those qualities, I have found that these old computer fans can continue to live on a small desk fan and can be made to run off of one of my computer's USB ports.

Over the years I have made quite a few of these fans.

The other day I was digging through the junk box when I came across a computer fan that was made from clear plastic and had some LED's installed around the outside of the fan shroud. Hooking up the fan to a power source showed that the fan did still work, though the LED's were definitely no longer functioning.

The fan also included a small metal grill that added a bit of a decorative touch - the perfect raw ingredients for a new desk fan.

The first thing I did was to cut off the connector at the end of the fan.

Sunday, April 21, 2019

Turning Bowl Blanks

Turning wood bowls can be a really relaxing pastime - but you need to be prepared first

I have always admired the craftsmanship that went into turned wooden bowls so I was always a bit keen to try my hand at making one.

A little while ago I found a small wood lathe that was on sale for a ridiculously cheap price at my local hardware store.So I took advantage of the opportunity and immediately grabbed it.

When I got the lathe home and set it up, I first thought it prudent to at least look at some how to videos on line to figure out to do wood turning. Once I watched a few videos, I determined that I got the gist of it and got right to it.

I immediately put a small block of wood on the lathe, fired up it up and armed with a chisel, took a stab at making my first bowl.

It didn't go very well.

While I could make a real nice wooden cylinder on the lathe, I ran into some trouble in trying to make the "bowl" part of the bowl. When the chisel got caught by the spinning hunk of wood and was flung across the shop where it embedded itself into the far wall, it was time to call it quits.

I figured at that precise moment that perhaps I should do a bit more than watch videos before I tried that again.

Fast forward a couple of months I attended a day long wood turning workshop at one of my local woodworking stores where I was able to get some hands on training on how to properly turn a wood bowl. A really nice bonus was that I also able to come home with a really nice bowl that I made myself.

For anyone who wants to learn how to do any sort of wood turning, I really do encourage that you find a course like this in your area.

Sunday, April 14, 2019

The Internet of Stuff

A couple of small couple of small electronic parts and the world will know how could my home is

As a bit of a departure from my normal posts, I'm going to be getting more into software than softwood, but there will be a woodworking tie in at some point in the future. We just need to lay down some groundwork first.

In recent years, there has been a lot of buzz going on about having what used to be very mundane everyday household items become "smart" by being able to be connected to the internet and communicate with you or with other smart devices.

This concept - more commonly referred to as the "Internet of Things" (or IOT) - has unleashed an avalanche of smart thermostats, front door locks and refrigerators - all with the ability to let you know whether you need milk or that you've left the back door open and now the cat has escaped and is terrorizing the neighborhood.

Being someone who has made a career in the Information Technology field, I was starting to feel a wee bit out of the loop about these things - not a good place to be for any self-respecting IT guy.

I could have just simply read up on IOT devices, but why waste a perfectly good excuse for a bit of puttering in the shop...

As I mentioned in my previous post, you can literally build anything with a little electronic "LEGO". A quick search of the internet showed me many examples of people building their own IOT devices in such a way.

One common thing that I found with these projects was that a lot of them used a small Arduino compatible device based on the ESP8266 board.

Sunday, April 7, 2019

Project - Junkyard Compass and Thermometer

Junkyard compass and thermometer

This project was born from a need to address a couple of features that I wanted to have in my truck.

The first feature was to have an electronic compass to serve as a companion to my 2 meter amateur radio rig. As a severe storm spotter, knowing what the direction is of the weather that I'm observing is essential for when I need to radio in my reports.

The second feature is more along the lines of creature comforts. Many vehicles these days have an outside temperature read out feature, however you very rarely find one that will display what the temperature is inside the vehicle. I always wanted to know what the actual temperature is in the car when I'm driving (and it's a great help in solving those age old debates that you sometimes have with your passengers on whether it's "too hot" or "too cold" )

For more details on how you can build one of your own, just click on this Link

Sunday, March 31, 2019

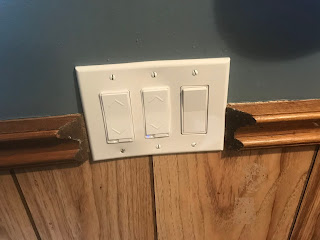
Installing a Wi-Fi Enabled Dimmer Switch

Harnessing the power of the internet - to turn on your lights

A little while ago I gave a wall outlet in my house a bit of an upgrade by replacing it with an outlet that also doubled as a USB charging device.

I was actually pretty intrigued about the idea of adding additional little enhancements like that to my home. One thing that has always been a bit of a sore point in my household is that sometimes we go out for an evening, usually when it's still daylight out, only to come home to a dark house because we forgot to turn an outside light before we left.

I live in a rural area, so it gets pretty dark out and it can be quite the struggle to unlock the front door in the dark.

I had heard of new light switches on the market that could be connected to your smartphone via your home Wi-Fi and internet connection. Drawing on my fresh experience with the wall outlet, I thought I would take a quick look at them during my next foray to the hardware store.

Now my initial thought that the label "Smart" was just a code word for "expensive", but to my surprise, I found a pair of smart dimmer switches for about 20 dollars.

So, they came home with me.

Sunday, March 24, 2019

Thrift Store Recon

Bargains as far as the eye can see


True to form, I am always on a never-ending quest for finding things that a lot of folks would otherwise consider "trash" with the intent of giving them new life in a new form.

As opposed to roaming the local junkyard or raiding the e-waste for raw materials for my projects, I sometimes go upmarket and occasionally check out the local thrift store.

The nice thing about thrift stores is that they are typically run by a charity where all the profits from the store usually go to helping others in my community. Because the proceeds are for a good cause, people typically donate items that still have a great deal of life left in them.

The fact that the items for sale in the store are dirt cheap is always a very nice bonus!

So I usually find my local thrift store a source of good cheap parts for my project ideas.

But I also get a great deal of entertainment in perusing the aisles. I often find things just make you wonder why anyone would ever want to buy it

For example, things like bowling trophies from 1986.

Sunday, March 17, 2019

Building a Wireless Speaker

The completed entertainment system
Completed wireless speaker

After a few months of puttering away on the junkyard entertainment system, the end is finally in sight.

With the completion of the display and DVD units of the system, the only thing left to do to complete the system was to give it a voice.

As you may recall in a previous post, I constructed and tested an infrared transmitter and receiver system that would allow the entertainment system to transmit sound wirelessly. Now that we have installed the transmitter part of this arrangement into the DVD player, we needed to give the receiver the same treatment.

Therefore the focus of this post will be on building a wireless speaker. Even though these particular speakers will be for our entertainment system, you can build these for almost any situation where you would like to have wireless sound.

Construction of the speaker itself is fairly straight forward since it really comprises of 3 main components:
  • A Speaker
  • A cabinet for the speaker
  • The infrared receiver to drive the speaker. 
Almost any speaker will work. In my case, I picked up some very inexpensive car speakers that came with their own speaker grill at my local surplus store. 

Likewise, the speaker cabinet in itself is fairly easy to build. 

To build the cabinet, I based the dimensions around the speaker grill and the depth of the speaker itself.  Based on that information I determined that a finished speaker cabinet of 6 inches by 6 inches with a depth of 5 inches would work the best. 

Armed with that information, I cut out four pieces of 1/2 inch birch 6 inches wide but a little longer than 6 inches in order to allow for some trimming for length later.

Sunday, March 10, 2019

The Quest for Cheap Lumber


Being someone who is frugal - OK, Let's be honest, I'm cheap -  I'm always on the lookout for a great bargain.

One thing that always bugged me over the years was that the price of wood just seemed to get more and more expensive. For a lot of years I used pine almost exclusively for all of my projects since that was the cheapest wood that I could buy.

Now, I don't really have anything against pine. I find it to be a very nice wood to work with, can be very forgiving of any small mistakes that I may make and looks very attractive when it's finished in a nice coat of varnish.

But there are a lot of nice types of wood out there, especially hardwoods that have really nice grain patterns like Maple or Oak that I wish I could use without taking out a second mortgage.

Out in the rural areas where I live, there are a lot of road side stands that sell firewood for people that are going camping or want a little fire to roast marshmallows in the backyard. I should also mention that there are a good number of Mennonite furniture makers in my area, which leads to today's tale.

On the way home from work one day, I thought it would be a good evening to have a nice fire in the backyard and unwind from a busy day. With that in mind, I stopped at a road side stand that was selling a very large bag of wood for $3. Getting out of the car and looking at the bags of wood for sale, I noticed one thing...

Sunday, March 3, 2019

Project - Solar Powered Vacuum Tube Display


One of my hobbies involves the reviving of antique radios. I suppose it's basically just a natural extension of what intrigues me - that marriage between wood and electronics.

Back when they were new, antique radios were considered to be a major purchase for a family and as such they were traditionally considered fine furniture. As a result the cabinets that housed the electronics for these radios often were built out of expensive woods like walnut or oak and were built to a high level of craftsmanship.

I always took a lot of joy in restoring an old beat up cabinet to it's previous glory and to have the electronic bits inside sing once again.

Back in those days there were no transistors, instead the function that transistors handle today were manged by vacuum tubes. While vacuum tubes certainly worked quite well (in fact audiophiles today swear that the best sound come from vacuum tube amplifiers) and their glow was always a welcome sight, they did have a tendency to burn out after a while.


During my radio rescue efforts, I had managed to accumulate a bit of a collection of defunct vacuum tubes. Now personally, I had always found the design of these tubes to be quite interesting and I never could bring myself to throw them out. 

Now I didn't really want them to just still in a box in a closet somewhere, so why not put them on display?

With this project I think I managed to give these old tubes a place of honor with the added bonus of restoring some of that glow they used to give off.  

I am also very proud to say this project was a runner up in the Instructables 2017 Solar Contest.

Sunday, February 24, 2019

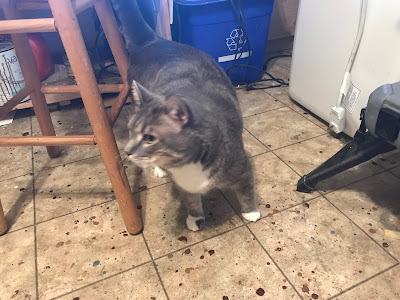
The Shop Supervisor

Shop supervisor, making his rounds

Most of the time I consider the time in the shop to be my "me" time.

Time to my self, away from the hassles of the day, to dream and create anything that pops into my head.

On a really tough day, the thought that I will be able to have some of that precious shop time later that night always keeps me going.

For the vast majority of the time, I am alone, tinkering away on my vision. But every once in a while I do get my puttering interrupted by a bit of verbal feedback concerning the progress of my projects from the shop floor.

The shop supervisor has arrived.

Now I usually can just appease him with some well-placed scratches under the chin, and maybe a few cat treats and then he goes on his way, but sometimes he really wants to closely inspect the work in progress to ensure that I'm not up to no good.

That's where it can get a bit tricky. There have been a few occasions where a paw has accidentally stepped into an open paint can, which sometimes requires a bit of a chase around the house in order to get him cleaned up - at least one good thing it's easy to find him since I just need to follow the trail of paw prints through the house.

Thankfully this is a fairly rare occasion, most of the time the supervisor is there to provide a welcome break and to give a friendly hello.

Then, of course, there's the yard supervisor.